Alfresco ADF Launch Pad Tutorial
Hyland’s Alfresco platform offers open, cloud-native content management solutions to connect, manage and protect your enterprise’s most important information, wherever it lives.
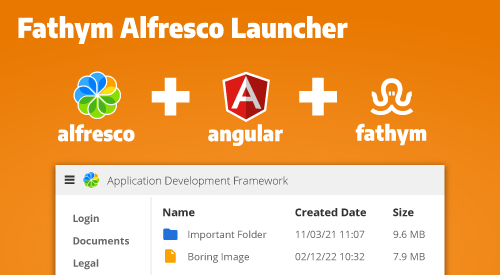
The Alfresco Application Development Framework (ADF) is a modern JavaScript-based framework to rapidly build engaging web applications on top of the Alfresco Digital Business Platform. It provides a rich set of reusable Angular based UI components and services, command-line tooling and JavaScript APIs.
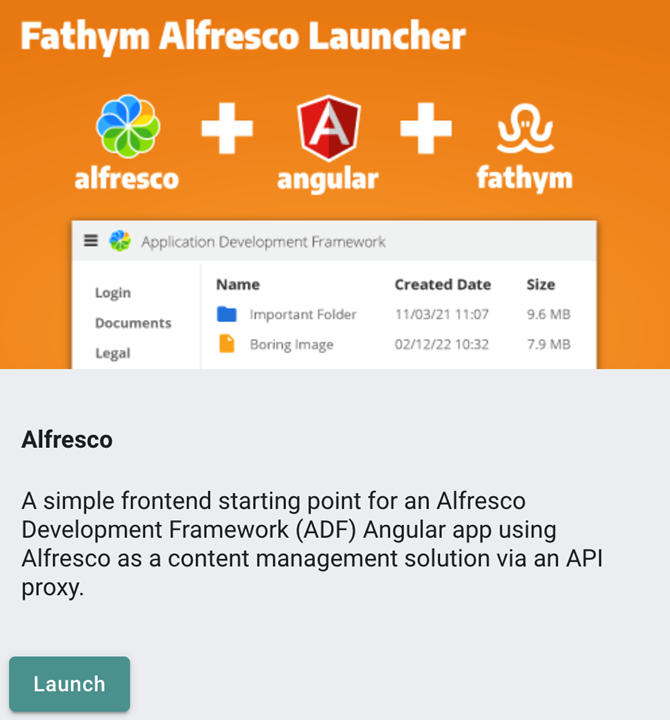
Fathym offers an automated launch pad that consists of a frontend starting point for an ADF Angular app that can be connected via a pre-configured API proxy to a self-hosted instance of Alfresco Community. Fathym gives users a streamlined development and CI/CD workflow to accelerate custom ADF development and automate the deployment of frontends.
You can use either the platform user interface or CLI. We’ll guide you through both options.
Prerequisite: You have a self-hosted instance of Alfresco Community edition.
User Interface
Sign up for a free Fathym account on our website or sign in if you already have one. In the main dashboard click 'Add Project' and you will be navigated to Fathym’s templates. You should see the Fathym Alfresco Launcher. Click ‘Launch.’
You will be prompted to connect to your GitHub account if you haven’t already. You will then be asked to select one of your available GitHub organisations and ‘Deploy Project.’ This will fork a repository to your GitHub organization, set up GitHub Actions for source control, build pipelines and release management and deploy the launch pad to your Fathym enterprise.
Once you have completed this step, you will be directed to the main dashboard. It usually takes a couple of minutes for the build to complete, you can see its progress in the activity feed of your dashboard. You can also click ‘Open Repository’ to open the forked repository in your browser or click ‘Build Details’ to view the GitHub Actions running the build.
CLI
If you wish you can also deploy the launch pad through the Fathym CLI. There are 3 steps involved:
- Install Fathym CLI
- Authorize GitHub
- Deploy launch pad
If you already have a Fathym CLI set up and connected to GitHub, skip to step 3.
Step 1 – Install Fathym CLI
To install the CLI, in your IDE of choice open a new terminal and run the following command:
npm install @fathym/cli@latest –g
This runs an NPM global install of the Fathym CLI.
To authenticate the Fathym connection for the CLI give the command:
fathym auth
This will open your browser and prompt you to sign in. This will allow you to connect to your Fathym enterprise.
To view a list of your available enterprises, run:
fathym enterprises list
Then set the active enterprise by selecting your enterprise from the list and using the following command (if you have just created an account, there will only be one option):
fathym enterprises set
This will set the enterprise that you will work with and manage. If you are just starting with Fathym, this will be the lookup for your personal enterprise.
The previous Fathym commands will only need to be run again if you lose your authentication or want to change the enterprise you are managing. Otherwise, they do not need to be repeated
Step 2 – Authorize GitHub
Now you need to connect Fathym to your GitHub organization of choice. The launch pad for Alfresco Community will fork a repository to your organization and set up GitHub Actions for source control, build pipelines and release management.
To connect Fathym to GitHub, run this command.
fathym git auth
This will open a new window for GitHub authorization where you can determine which organizations Fathym has access to (you may have to sign up if you have not before). Grant access to the organizations you would like us to help you manage and automate.
You can run this command anytime you want to adjust the authorizations in GitHub for new or existing organizations.
Step 3 – Deploy launch pad
Now it’s time to install the launch pad for Alfresco ADF. Run the following command:
fathym lcu @fathym-hyland/lcu-alfresco-default
This will fork a repository to your GitHub organization, set up GitHub Actions for source control, build pipelines and release management and deploy the launch pad to your Fathym enterprise.
To view the project in your Fathym enterprise, open the Fathym dashboard and navigate to the project that was created for Alfresco:
fathym enterprises dashboard
Assess what’s been deployed
In your dashboard you will see a list of any projects deployed to your Fathym enterprise.
Click the edit button beside the Alfresco project.

In this project you will see that 5 routes have been deployed.
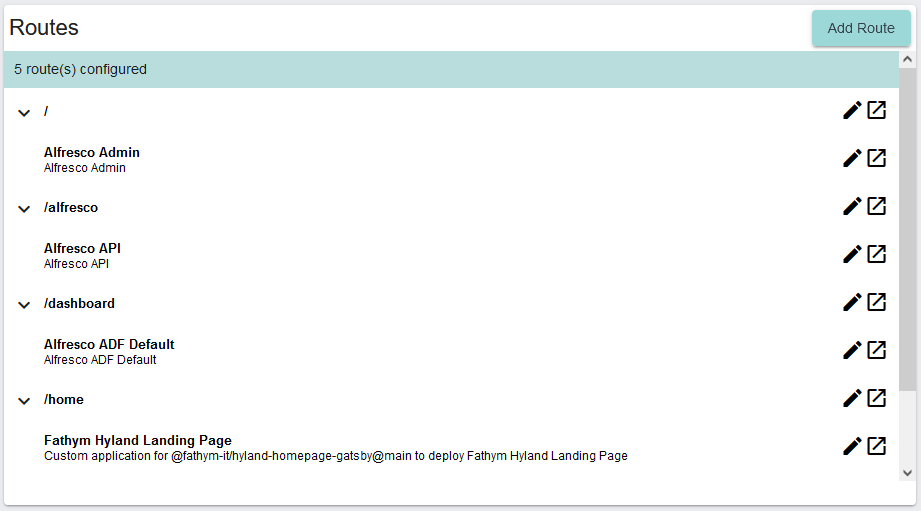
You can click the edit buttons on each route to see what’s going on behind the scenes or the launch buttons to open a route on your browser.
The following modular routes have been deployed to a domain generated in your Fathym enterprise:
A SPA proxy is set up (on route /) to host the user interface of Alfresco's admin portal on a path on Fathym. We will do some additional configuration in the next step.
An API proxy is configured (on route /alfresco) to securely connect your Fathym enterprise to your self-hosted Alfresco backend instance. We will do some additional configuration in the next step.
The Alfresco Angular application (on route /dashboard) is a starting point for custom development with ADF. This was deployed from an NPM Package.
A simple landing page (on route /home) with information about this launch pad. This was deployed from the repository that was forked to your GitHub organization. This landing page was created using the visual page builder Plasmic and showcases Fathym's ability to host repositories from GitHub.
Finally, an instance of Storybook (on route /qa/storybooks/hyland-flow) has been provisioned to help manage the testing of any custom ADF components.
Integrate Fathym and Alfresco
Now it’s time to connect your Fathym enterprise to your self-hosted Alfresco backend.
As we just saw, included in the project are SPA and API proxies that are already partially configured.
To complete confiruration of the proxies you must obtain the public IP address of the mechanism that is running your Alfresco instance.
When you have this, click the edit button for the SPA proxy on the / route.
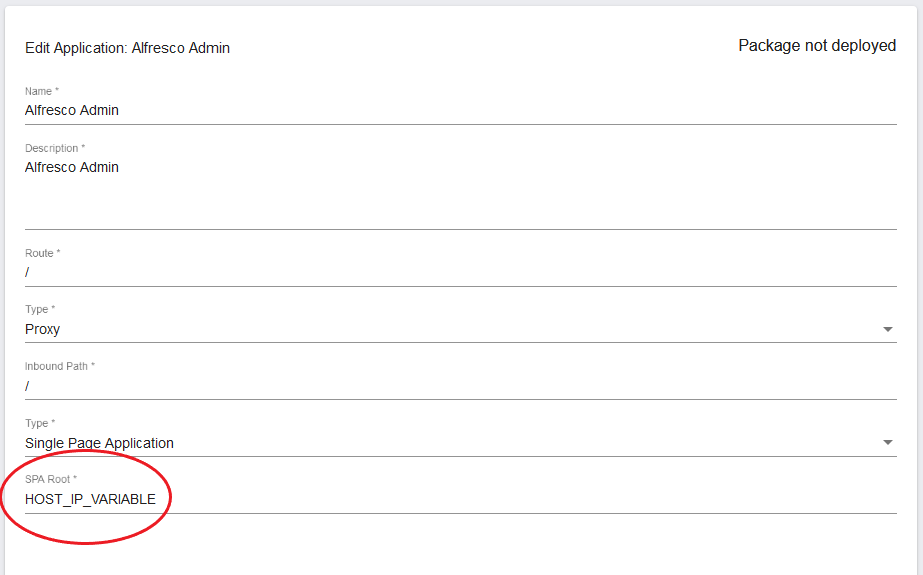
Input the public IP address in the SPA Root field (highlighted above) and click save.
Next, click the edit button for the API proxy on the /alfresco route.
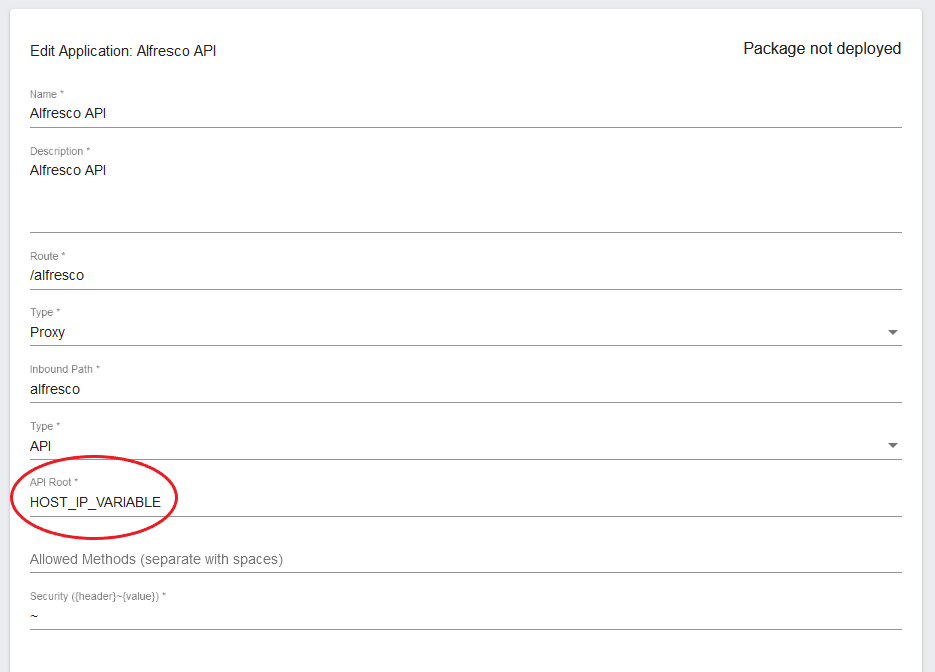
Input the public IP address in the API Root field (highlighted above) and click save.
Your Fathym enterprise and Alfresco instance are now integrated. You can launch the Alfresco on the / route and log in with your Alfresco admin username and password. Now you can develop and deploy ADF powered applications that pull in and display content that is managed in your Alfresco.