Alfresco Community on Azure Launch Pad Guide
Hyland’s Alfresco offers open, cloud-native content management solutions to connect, manage and protect your enterprise’s most important information, wherever it lives.
The Alfresco Application Development Framework (ADF) is a modern JavaScript-based framework to rapidly build engaging web applications on top of the Alfresco Digital Business Platform. It provides a rich set of reusable Angular based UI components and services, command-line tooling and JavaScript APIs.
Fathym offers an automated launch pad for deploying Alfresco Community to Azure with the Fathym CLI. The launch pad also contains a frontend starting point for an ADF Angular app that is already integrated with the Alfresco instance on Azure via a pre-configured API proxy. Fathym gives users a streamlined development and CI/CD workflow to streamline custom ADF development and automate the deployment of frontends.
We will cover the following steps in this tutorial.
- Register for Fathym and purchase cloud plan
- Set up Fathym CLI
- Connect Fathym to GitHub
- Connect Fathym to Azure
- Launch Alfresco Community on Azure
- Assess what’s been deployed
Fathym LowCodeUnits (LCUs) are composable automations of software components, configurations and services, and the building blocks of Fathym’s world. These flexible automations are versatile and can range from small instructions for scaffolding code, to API proxies, cloud resources or applications. At its core, Fathym is a tool that allows you to efficiently craft software solutions by combining custom, open-source and SaaS/third-party LCUs.
Step 1: Register for Fathym and purchase cloud plan
To start working with Fathym, you'll need to sign up for an account on Fathym's website. You will be directed to the Fathym dashboard which gives an enterprise-level view of your account.
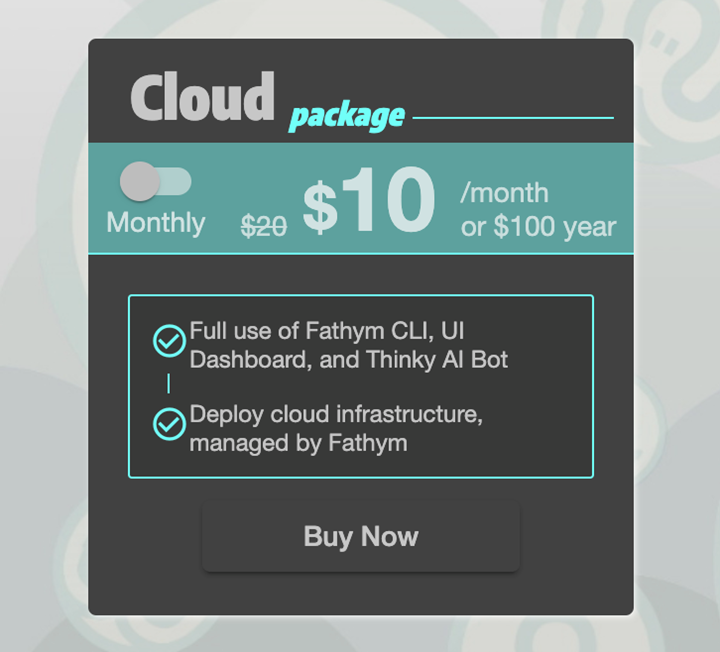
As you are going to deploy Alfresco Community to Azure and will be provisioning new Azure resources, you need to upgrade from the free starter plan to the cloud plan. This costs $10 a month (or $100 a year). This license gives Fathym the ability to deploy resources on your behalf to a managed Azure subscription.
In the top right of the dashboard click ‘upgrade plan’ and you will be directed to a billing page. Follow the steps here to purchase a license.

Step 2: Set up Fathym CLI
To deploy Alfresco Community on Azure we need to use the Fathym CLI.
To install the CLI, in your IDE of choice open a new terminal and run the following command:
npm install @fathym/cli@latest –g
This runs an NPM global install of the Fathym CLI.
To authenticate the Fathym connection for the CLI give the command:
fathym auth
This will open your browser and prompt you to sign in. This will allow you to connect to your Fathym enterprise.
To view a list of your available enterprises, run:
fathym enterprises list
Then set the active enterprise by selecting your enterprise from the list and using the following command (if you have just created an account, there will only be one option):
fathym enterprises set
This will set the enterprise that you will work with and manage. If you are just starting with Fathym, this will be the lookup for your personal enterprise.
The previous Fathym commands will only need to be run again if you lose your authentication or want to change the enterprise you are managing. Otherwise, they do not need to be repeated.
Step 3: Connect Fathym to GitHub
Now you need to connect Fathym to your GitHub organization of choice. The launch pad for Alfresco Community will fork a repository to your organization and set up GitHub Actions for source control, build pipelines and release management.
To connect Fathym to GitHub, run this command.
fathym git auth
This will open a new window for GitHub authorization where you can determine which organizations Fathym has access to (you may have to sign up if you have not before). Grant access to the organizations you would like us to help you manage and automate.
You can run this command anytime you want to adjust the authorizations in GitHub for new or existing organizations.
Step 4: Connect Fathym to Azure
Getting set up with Azure typically requires an Azure account, billing profiles and subscription. If you don't have any of that, no worries – we'll get you going now. Start by running the following command:
fathym eac env clouds azure define –g
The CLI will make sure the Azure CLI is installed and prompt you to use an existing Azure subscription or create a new managed Azure subscription. For this tutorial, select a new managed subscription. You will then be prompted to provide a name for the new subscription.
The previous command does a little more than just create a cloud draft. The -g also creates a service principal in the subscription that Fathym uses to manage Azure on your behalf.
With this process completed, commit the new subscription and define the cloud connection to your Fathym enterprise:
fathym eac commit "Azure Cloud Connection"
Step 5: Launch Alfresco Community on Azure
Now it’s time to install the launch pad for Alfresco Community on Azure:
fathym lcu @fathym-hyland/lcu-alfresco-community-on-azure
This process is made up of three phases:
- Configure resource group
- Set up Alfresco Community
- Configure Alfresco proxies
You will be prompted to create a new project, or you could select an existing project (if you have any). Then you will be prompted to choose a GitHub organization that the repository will be forked to.
Next, you will be asked to choose a cloud connection. You can choose the connection that was defined in the previous step. Then you will be asked to create a new cloud resource group or select an existing one. As this is a new subscription, you will create a new one and give it a name.
The CLI will now provision all the necessary resources for the first phase of installing the package. Once that is done you will be prompted to create an SSH Key. This will allow you to securely access the virtual machine that runs Alfresco Community. Finally, you will be asked to agree to the use of Alfresco Community by Bitnami, the pre-made template we’re using to deploy on Azure.
This will allow the second and third installation phases to proceed. Once installation is completed you will see several values in your terminal that were created. These include the SSH key and public IP address that you can use to securely access the Alfresco Community virtual machine. Take note of the admin username and password. You’ll need these to log in to the Alfresco admin portal and custom Angular site.
Step 6: Assess what’s been deployed
You don’t have access to the Azure portal for your subscription as it’s managed by Fathym, but this is what it looks like behind the scenes in Azure:

To view the frontend package that was just deployed and is already integrated with your Alfresco instance, open the Fathym dashboard and navigate to the project that was created for Alfresco Community:
fathym enterprises dashboard
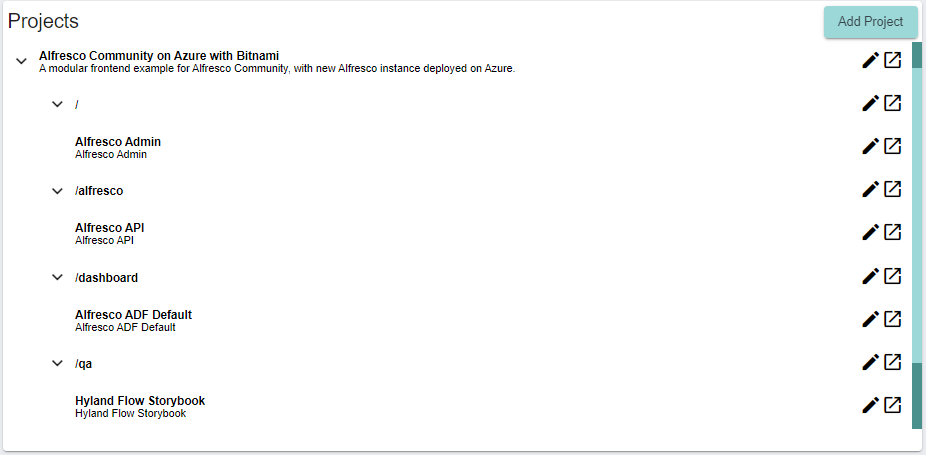
The project should look something like this. You can click the edit or launch buttons on each route to see what’s going on behind the scenes or to launch a route on your browser.
The following modular routes have been deployed to a domain generated in your Fathym enterprise:
A SPA proxy is configured (on route /) that hosts the user interface of Alfresco's admin portal on a path on Fathym. To log in to the portal, use the admin username and password that were generated in the previous step.
An API proxy is configured (on route /alfresco) to securely connect your Fathym enterprise to the virtual machine hosting Alfresco Community in Azure. Click on the edit button beside the route. On the API root field, you will see the public IP address that was generated in the previous step.
The Alfresco Angular application (on route /dashboard) is a starting point for custom development with ADF. This was deployed from the repository that was forked to your GitHub organization. Any time you commit changes to your code in this repository it will trigger a GitHub Actions build and will update your project hosted on Fathym.
Finally, an instance of Storybook (on route /qa) has been provisioned to help manage the testing of any custom ADF components.
