Deploying Custom Code
So far so good, we've created and deployed some initial projects in the previous step of this guide. Now you're thinking, "I've got my own code" or "I'd like to bring in a new project from scratch." No worries, we've got you covered with the custom project option.
Let's create our own project with GitHub source control, automated DevOps, and a Fathym project for deployment hosting. Keeping with the theme, we'll start with a simple JS, HTML, CSS site, though any modern static site (Docusaurus, eleventy...) or frontend framework (Angular, React, Vue, Svelte...) approach will work.
Automated DevOps
To build modern web projects, we'll need modern DevOps workflows. This means source control & builds & deployments, oh my. Let's set up the source control for our project now.
Source Control
Head into your organization inside of GitHub and create a new repository (we called ours my-first-project-public-web). Once that is done, we'll set up some lightweight application code.
Set Up Application Code
Go ahead and clone your git repository to your local environment so that you can edit it. While you can use any text editor to make changes, we recommend using an Integrated Development Environment (IDE) to make edits. A great option, available across platforms, is VS Code. Once you have your repository cloned you can start to make edits. First, we need to get our package.json created by running npm init -y (see here for information on installing node so you can use the npm command).
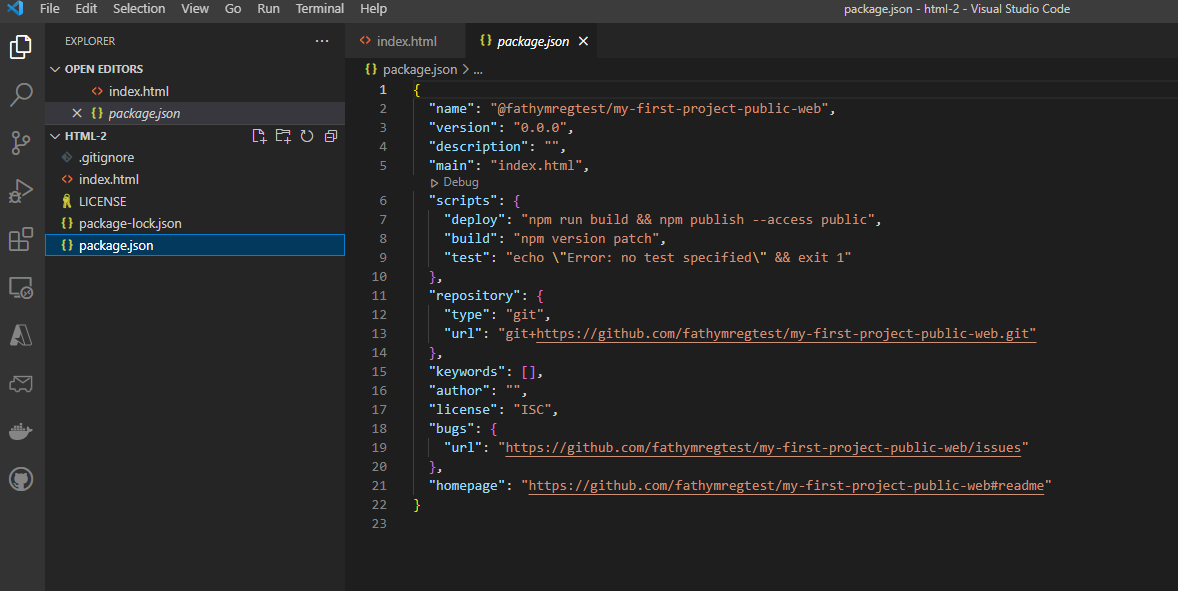
Let's clean up the package.json file that was generated so that it is ready to publish. Update the name to include the organization from above (I'm using milehighjackal, you should replace that with your username or organization), change the version to 0.0.0, and we'll update the main file to index.html. We can also add a starting point build and deploy script for the build pipeline as shown below.
{
  "name": "@fathymregtest/my-first-project-public-web",
  "version": "0.0.0",
  "description": "",
  "main": "index.html",
  "scripts": {
    "deploy": "npm run build && npm publish --access public",
    "build": "npm version patch"
  }
}
Open up the terminal now in the root folder of your application and run the following command:
npm install
Next add a .gitignore file at the root with a single line of content to ignore any node modules you may add in the future.
/node_modules
Code Application
Create a new index.html file at the root alongside the package.json file. Fill the contents of the index.html file with something like the following:
<!DOCTYPE html>
<html lang="en">
  <head>
    <meta charset="utf-8" />
    <title>My First LCU Application</title>
    <base href="/" />
    <meta name="viewport" content="width=device-width, initial-scale=1" />
  </head>
  <body>
    <h1>My First LCU Application</h1>
  </body>
</html>
Your finished package.json file and repository should look more or less like this:

You won't yet have any .github/workflows files, those will be created in the next step.
Deploy Application
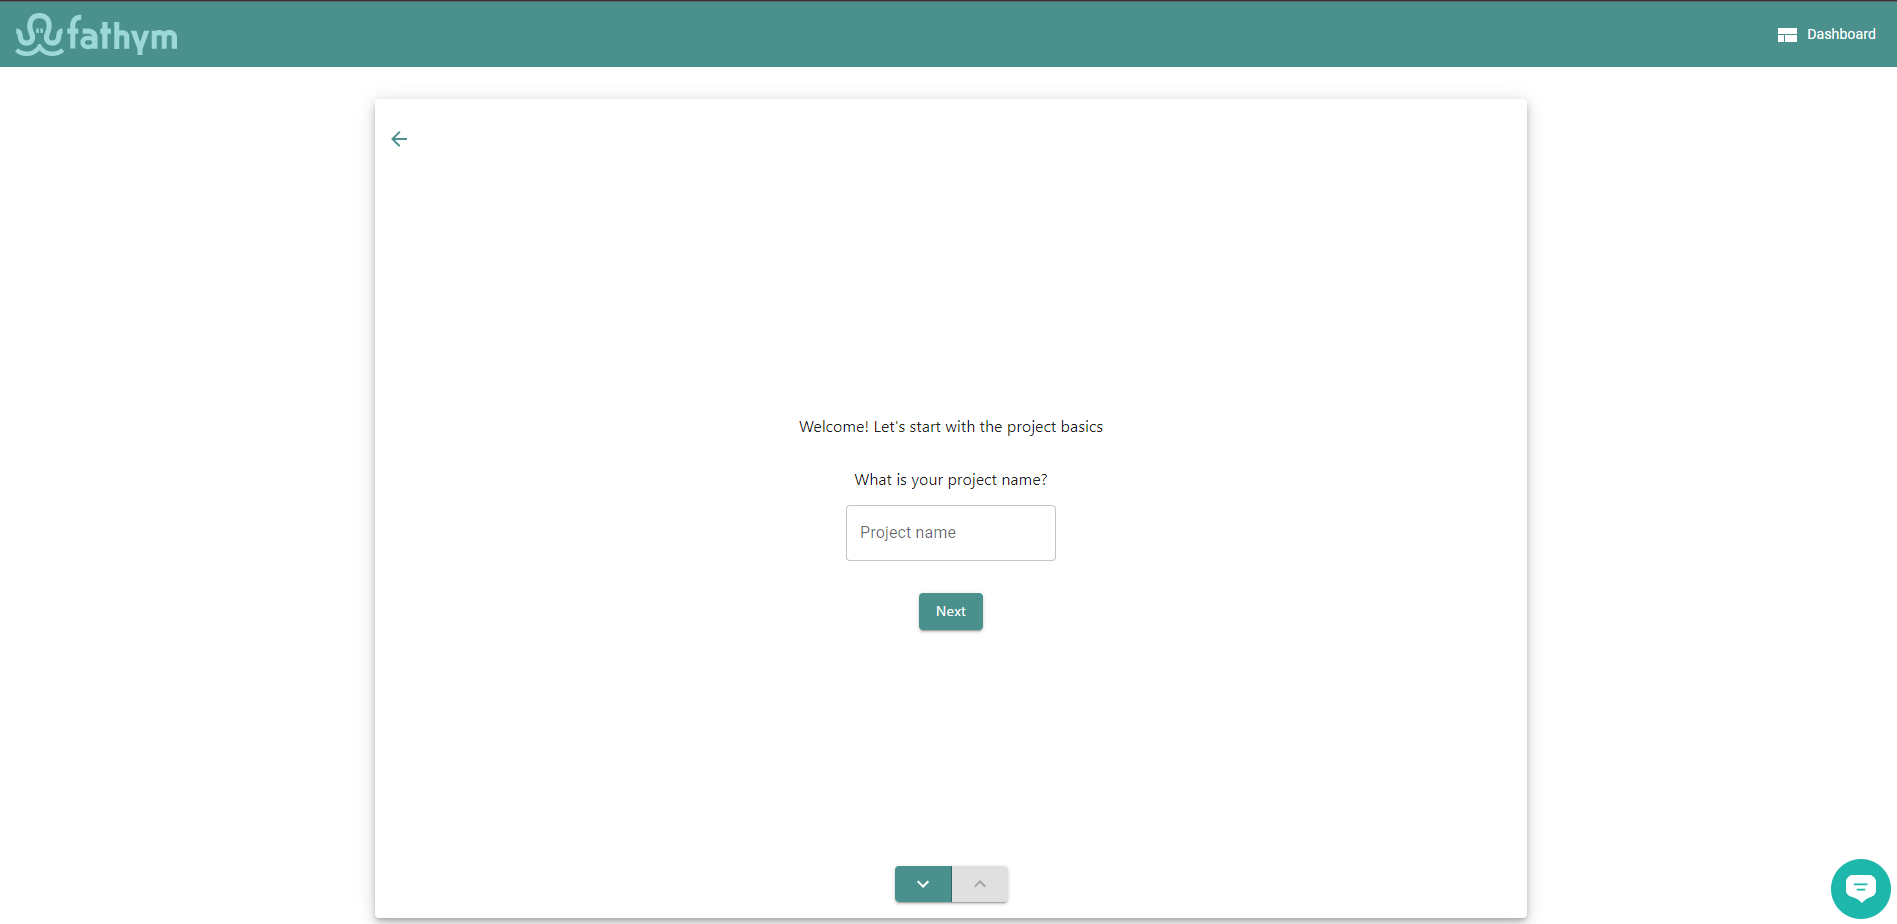
Now head back into the Fathym dashboard and click create new project from the dashboard and go to the create project wizard's custom project flow. If you've been following along, you should not see the GitHub authorization screen (as you are already authorized setting up your second project) and should see the project name input.

If you see the GitHub authorization screen, authorize with GitHub and provide Fathym with access to the desired organizations. Once completed you will be directed back into the custom project flow. More details can be found in the create project part of this guide.
Source Control Connection
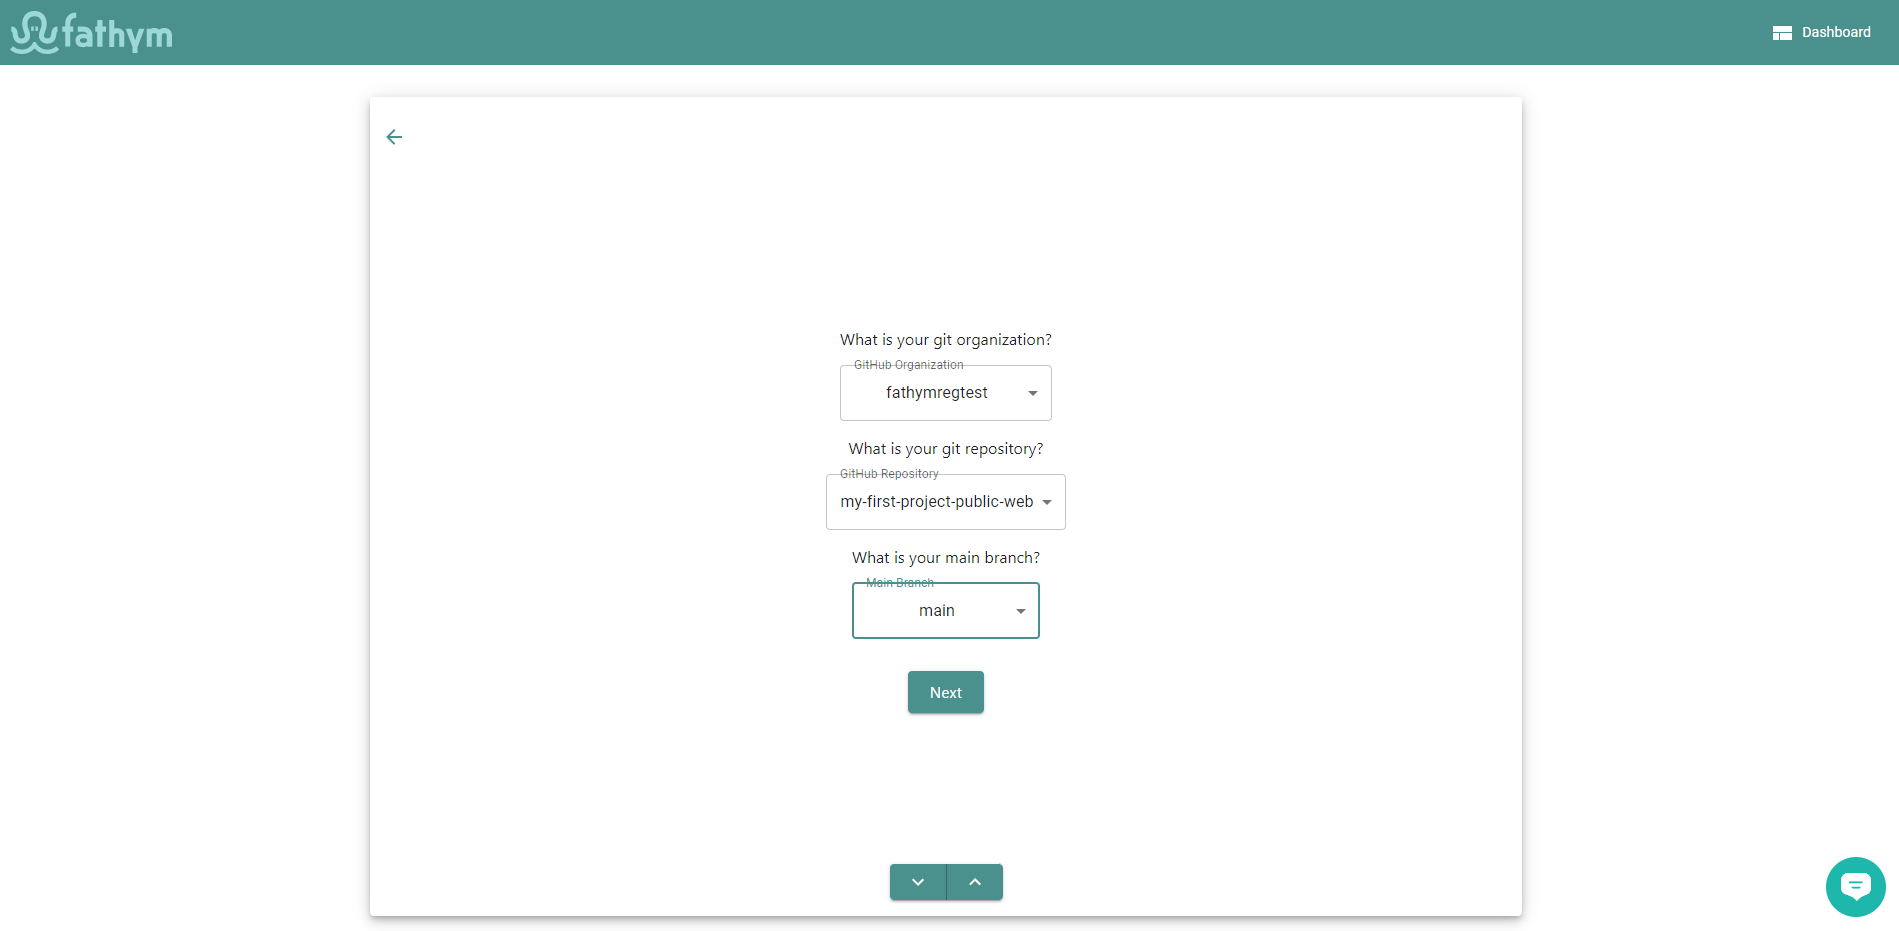
Input a name for your project (we're using My Custom Project) and then click next. This will bring up the source control information. A drop-down with the authorized GitHub organization options will appear first. Select any organization you want, we are going to use our user organization to get started. If the organization you selected already has a repository, you can select it or create a new one. We'll use the repository we created above named my-first-project-public-web. Finally, select the branch you want the initial build/deployment setup against (main if your following along with us).

Build Pipeline
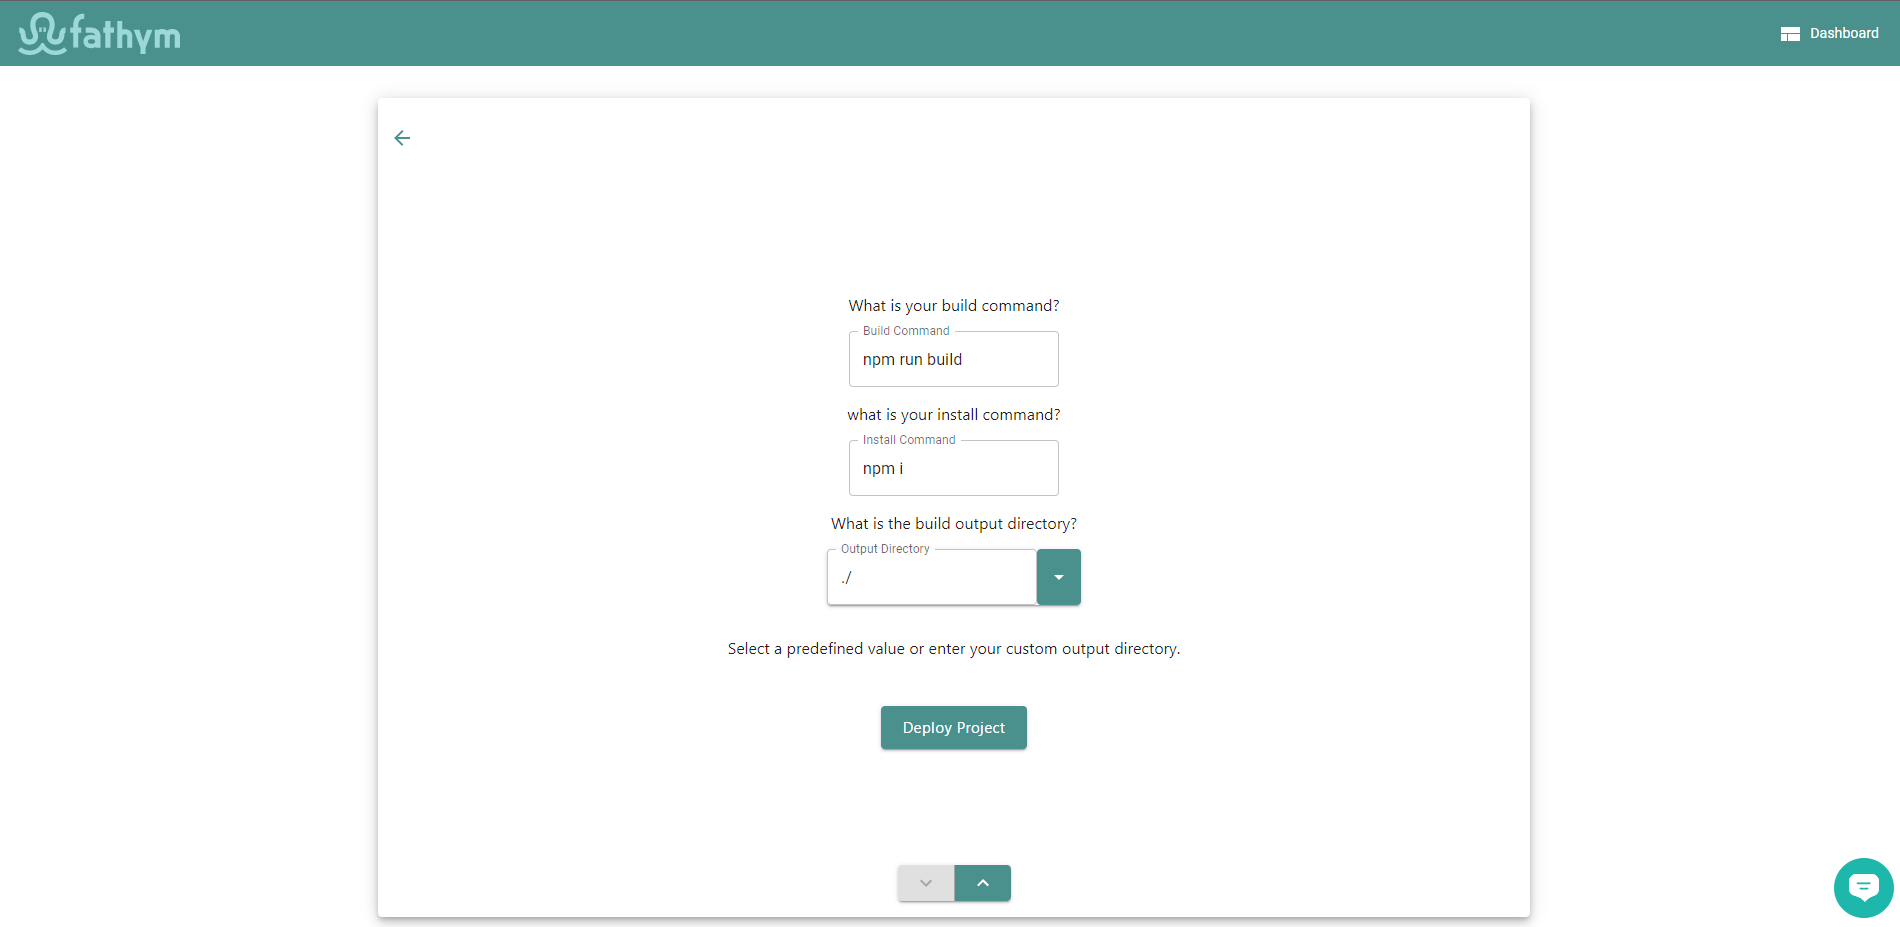
After connecting your repository, click next and it is time to configure the build pipeline which will help deploy your code for hosting. The form fields should be auto populated, if not then enter npm run build for build command, npm ci for the install command, and ensure output directory is set to ./. Now click on the to kick off project setup where build pipelines and deployment hosting will be configured.

Like before, the loading screen will show, and once complete you can continue to the dashboard. On the dashboard, you will now see all three of your deployed projects and should be able to launch them.
If the version of the site does not display right away, you may be waiting on the build in GitHub to complete. Wait a minute or two and try again and your site should load.