Hosting Docusaurus Sites
Getting your next site up and running with Docusaurus is a breeze with Fathym. Here, we'll quickly look at setting up the basics: a generic Docusaurus site and the Fathym setup (to power DevOps and deployment) so that you can focus on customizing your user experience.
Setting up the code
The first step for this guide is going to be setting up our source code and initial Docusaurus project.
Source Control
Let's get started setting up our GitHub repository. Choose the organization (or your individual account) in GitHub, select the repositories tab and then new repo. Give the repo a unique name and description, select public, and I like to seed the repo with a license file (generally an MIT license for something like this). Now that we have a repository set up, let's clone it to our local system and open the folder with VS Code.
Docusaurus Project
Generally you'll want to follow along with the latest docusaurus docs when creating a new project. Sometimes things change over there, but in general you'll want to run the following commands from within your new project to get it setup (replace my-website with a name of your choosing).
npx create-docusaurus@latest my-website classic
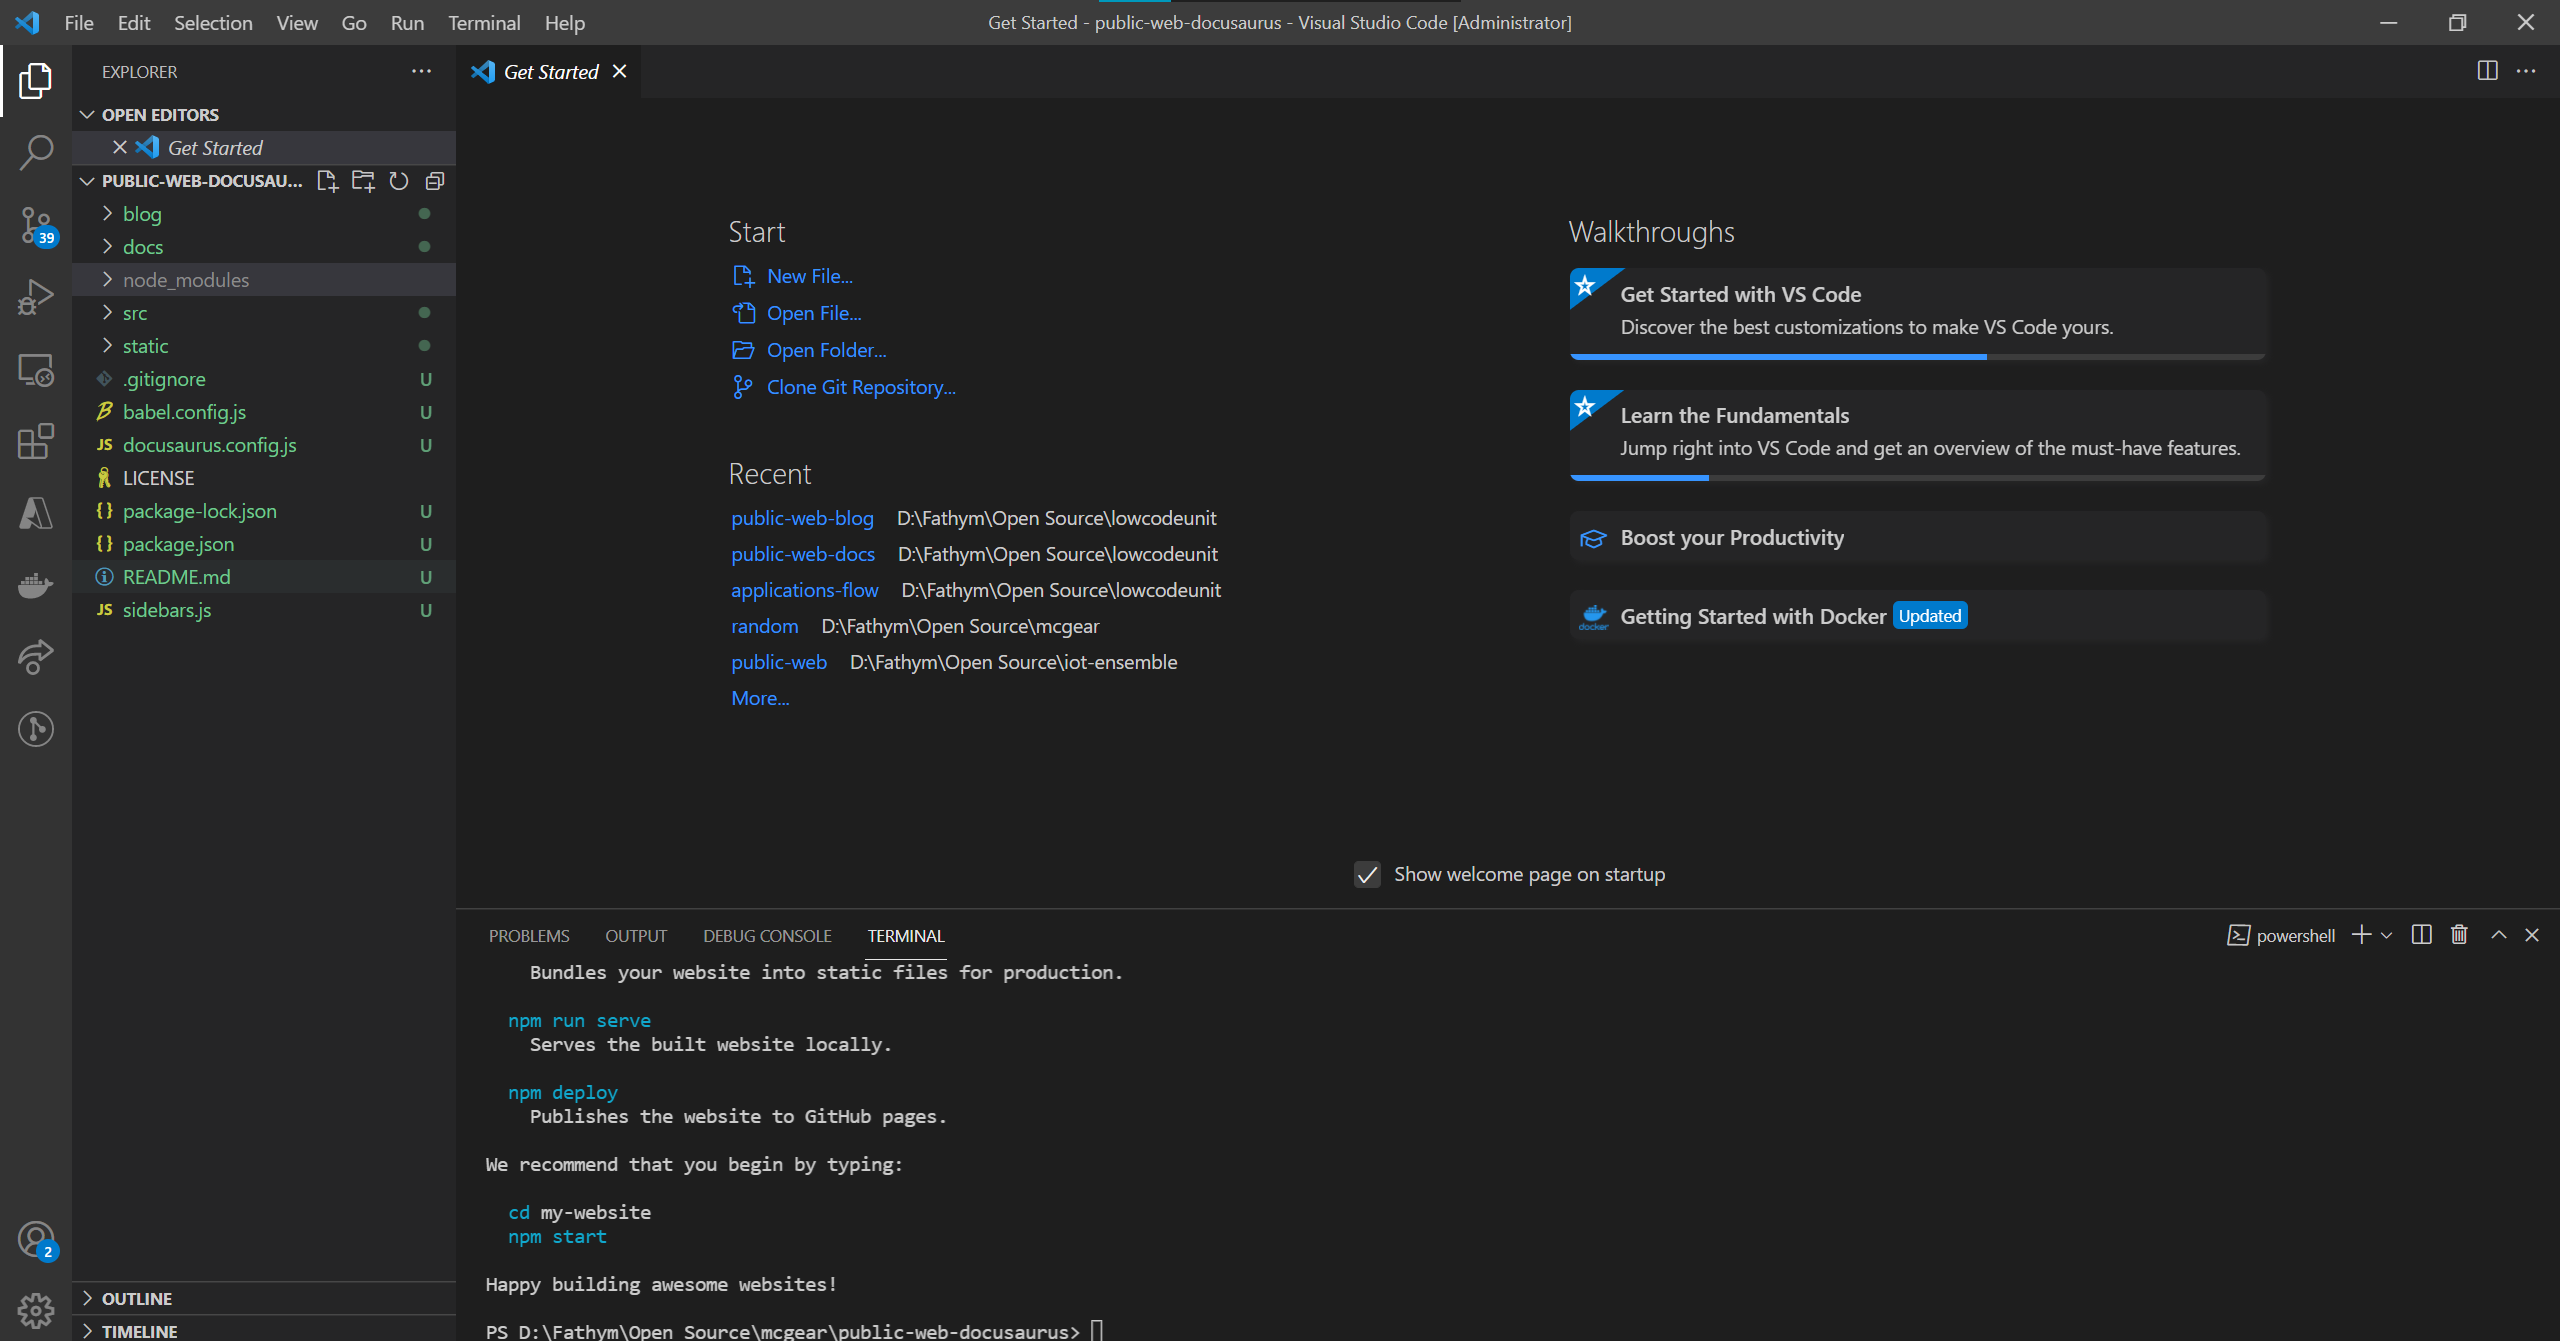
Next, we like to move the contents of the my-website (or whatever you may have named your project) directory up to the root of the project. This will leave a starting point that looks something like the following:

Now start and run the site locally using the following command:
npm start
With the site up and running, go ahead and commit the changes back into your repository so that our working (albeit basic) docusaurus site is up and ready for deployment.
Deploying the Code
Now we'll need to set up a couple of things to get our project DevOps and deployments working. You'll need to set up your free account at www.fathym.com to get started. Once in the dashboard, authorize with GitHub if you haven't already, and then select an existing project or create a new one.
For an in-depth look at some of the configurations we use here, check out the getting started guide.
DevOps Set Up
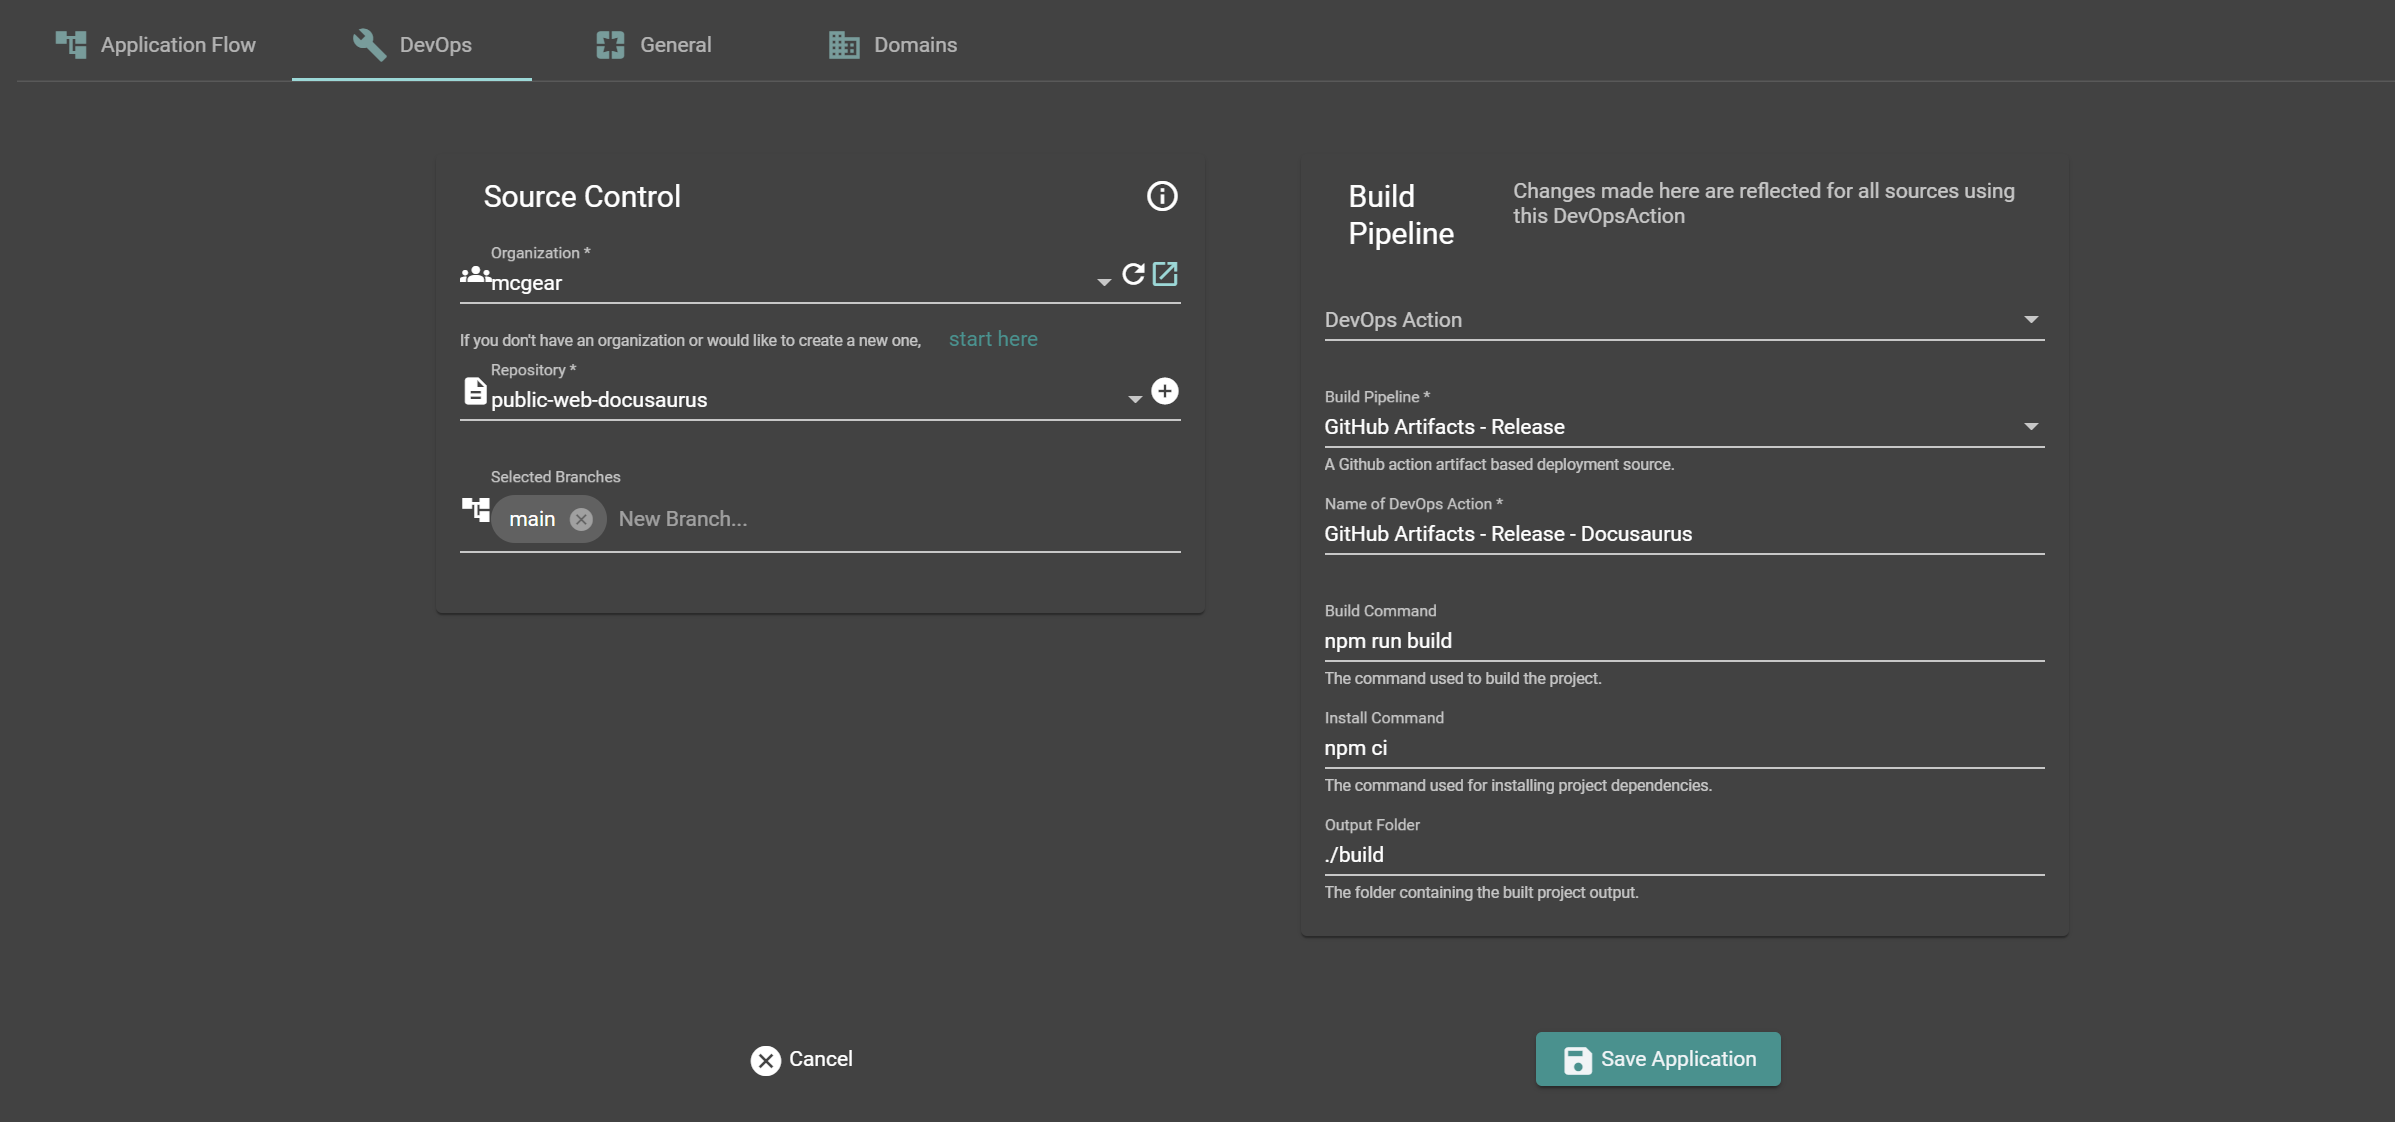
Now that we are in a project, let's start by setting up the DevOps from the tab. Once there, set up a new source control like the following (replacing the organization and repository with your own). The only major change from the defaults is to make sure the Output Folder is set to
./build.

Save the configuration and a new GitHub action will be created, and a new build will have automatically kicked off for your repository. Once this is complete, we'll be able to set up the application.
Fathym Application
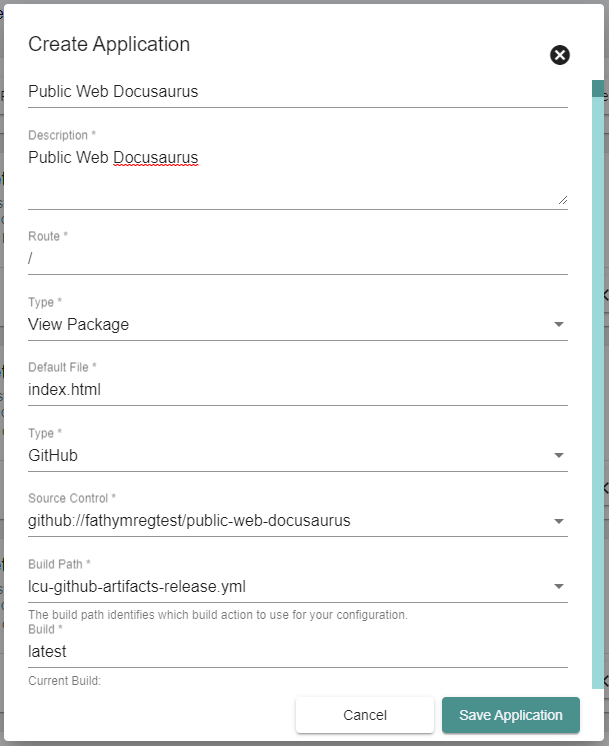
With our DevOps pipeline in place and a build completed, we can now use the GitHub artifact to deploy our code. From the Applications Flow tab, you should already be on the create application screen. Fill out the information for your repository, and select the correct GitHub view package settings. Your configuration should look like the following:

Save this form and your GitHub artifacts will be unpacked in the DFS for delivery to your users.
Custom Domains
As a bonus last step, you can follow our custom domain guide from the getting started to get your site up and running on your own domain.
Next Steps
Now you're all set up with a functioning development through deployment workflow for your Docusaurus project. Make changes and commit them to your repository, then follow our updating views guide to learn more on updating your builds, and use our testing use cases to learn how you can test new builds before releasing them to your users. Happy coding!
Fathym is an all-in-one platform for running web projects. This means you can use Fathym for hosting most, if not all, of your web projects. Fathym is simple to use and setup which works perfectly when you have a basic website you want to get up and open for the world to use quickly – like this Plasmic site. Sign up at www.fathym.com