Storage Access with Azure Machine Learning
Azure Machine Learning empowers developers and data scientists with a wide range of productive experiences for building, training, and deploying machine learning models faster. IoT Ensemble makes it simple to connect your devices and immediately use its data within Azure Machine Learning.
IoT Ensemble Storage Access
IoT Ensemble provides out of the box APIs that allow you to interact with your data and devices. Leveraging the cold query endpoint will allow us to easily connect with Azure ML. Check out the getting started guide for more details.
Azure Automated Machine Learning - Regression
Apply automated ML when you want Azure Machine Learning to train and tune a model for you using the target metric you specify. Automated ML democratizes the machine learning model development process, and empowers its users, no matter their data science expertise, to identify an end-to-end machine learning pipeline for any problem. Data scientists, analysts, and developers across industries can use automated ML to:
- Implement ML solutions without extensive programming knowledge
- Save time and resources
- Leverage data science best practices
- Provide agile problem-solving
Make sure that you've created your free Azure account, and walk through the setup process for a new subscription or use one that you've already setup. With your acccount and subscription in hand, you will also need to make sure you have an Azure ML workspace.
Once setup, you can access the Macine Learning portal, and dig deeper into the Azure Machine Learning docs on your own. We'll take you through some ways to start leveraging IoT Ensemble with Azure ML now.
If using our Enterprise plan, Azure Machine Learning will already be setup and configured for you in your azure cloud.
Configuring Automated ML Dataset
Once setup, launch the Azure Macine Learning portal and you'll land on the dashboard. From there, select the Automated ML option from the left, and then click  .
.
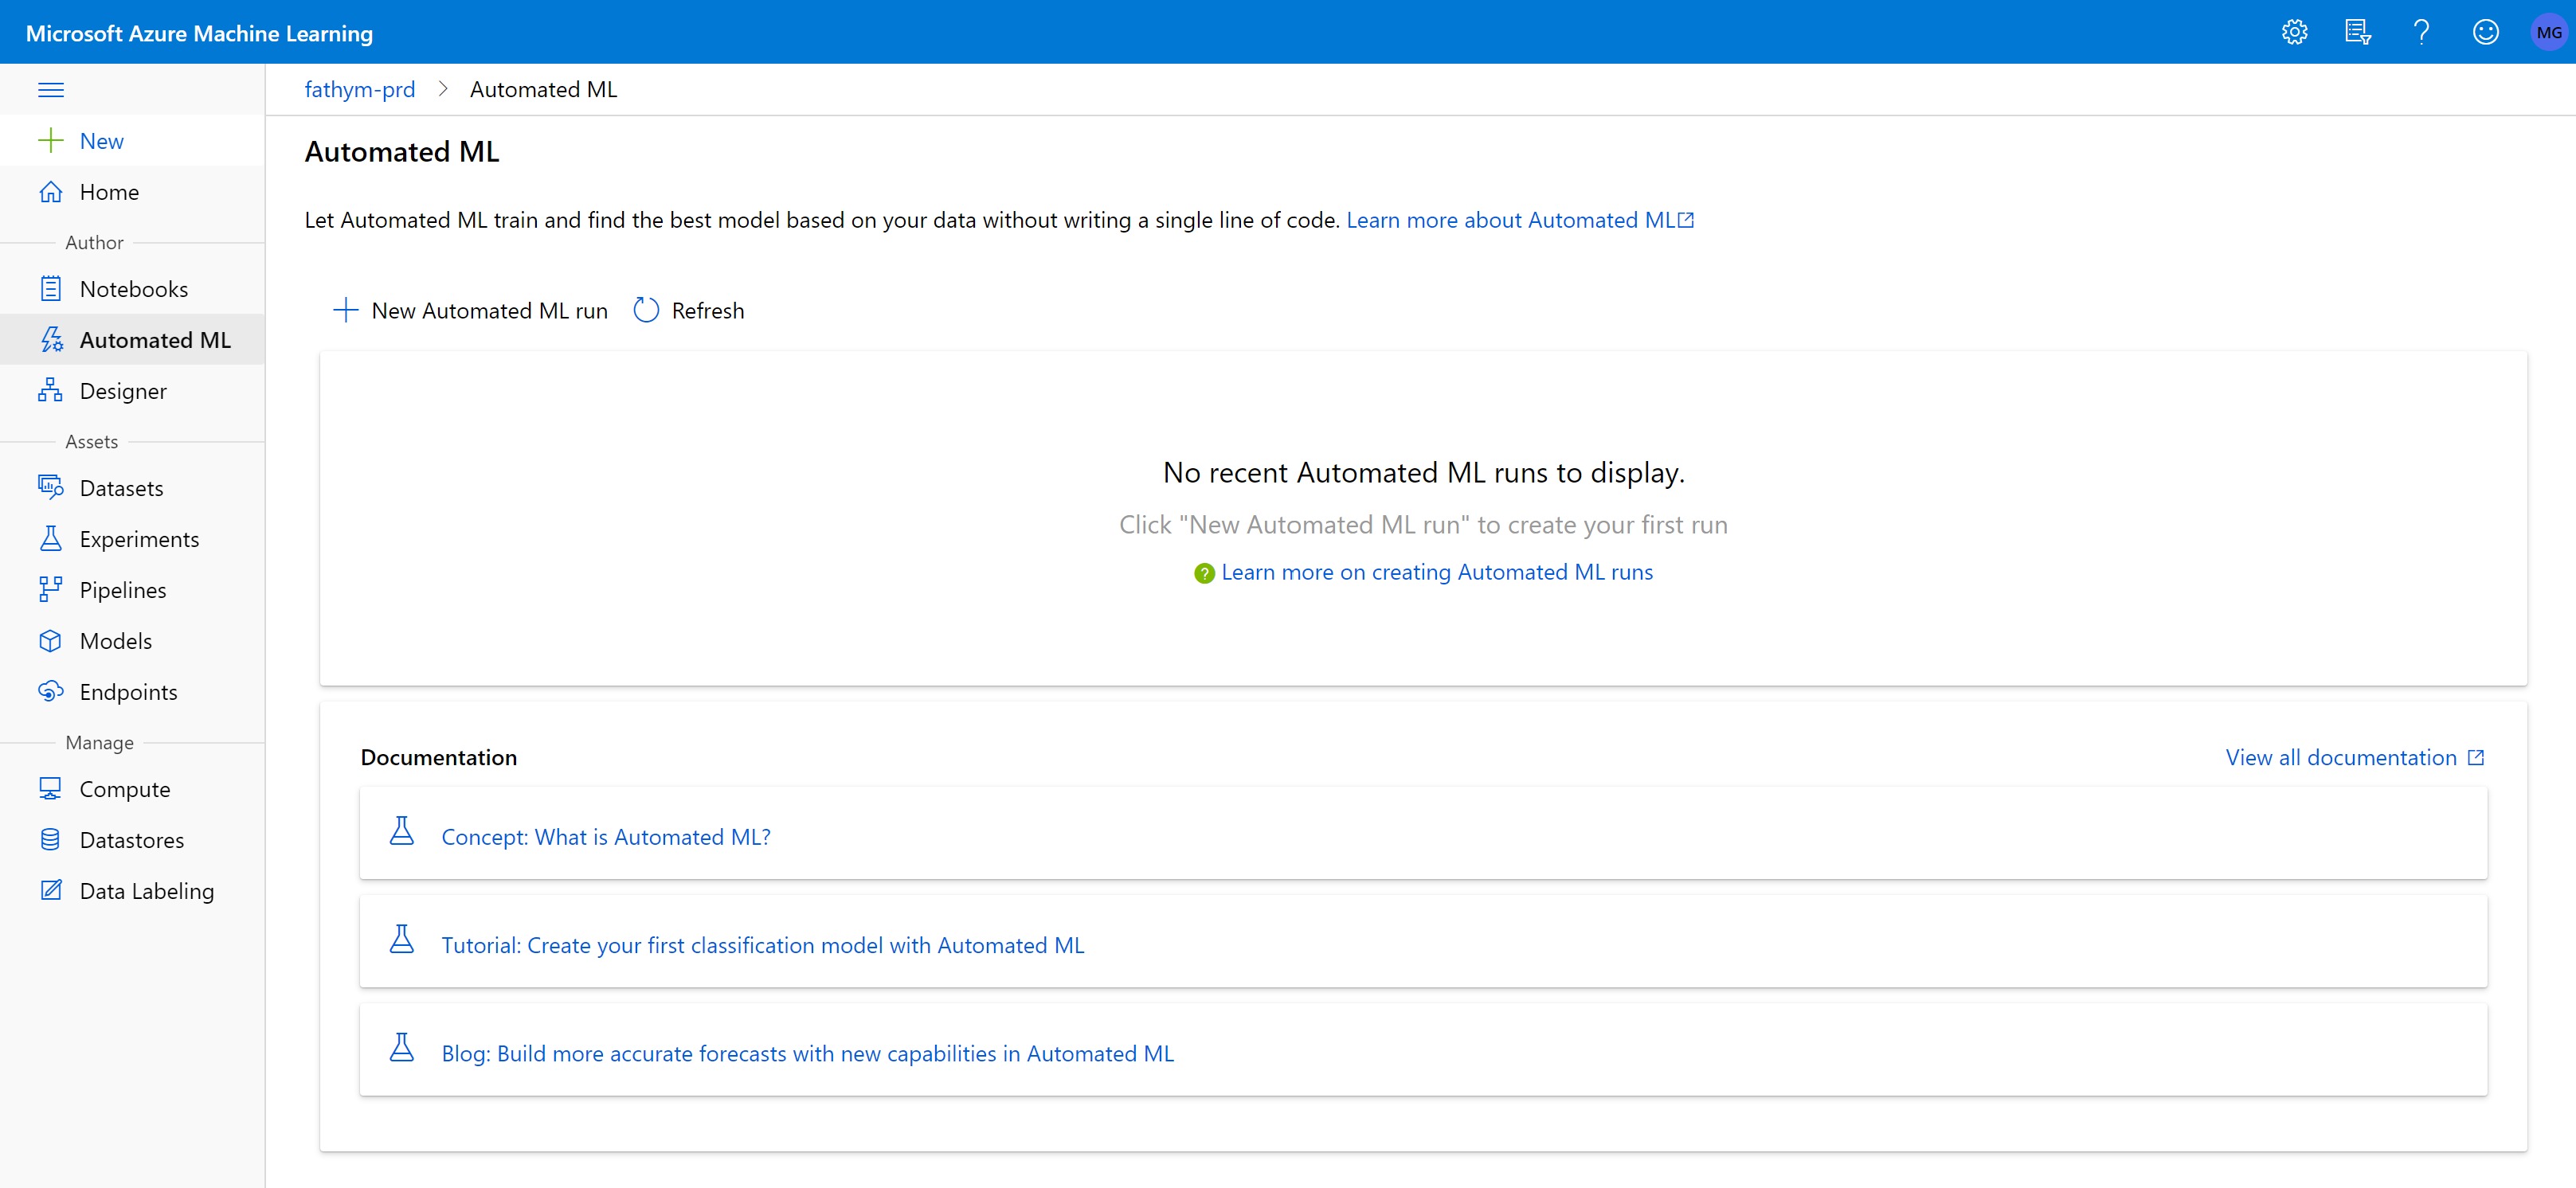
This will open the Automated ML Run wizard, where you can click Create Dataset > From web files to open the dataset wizard.

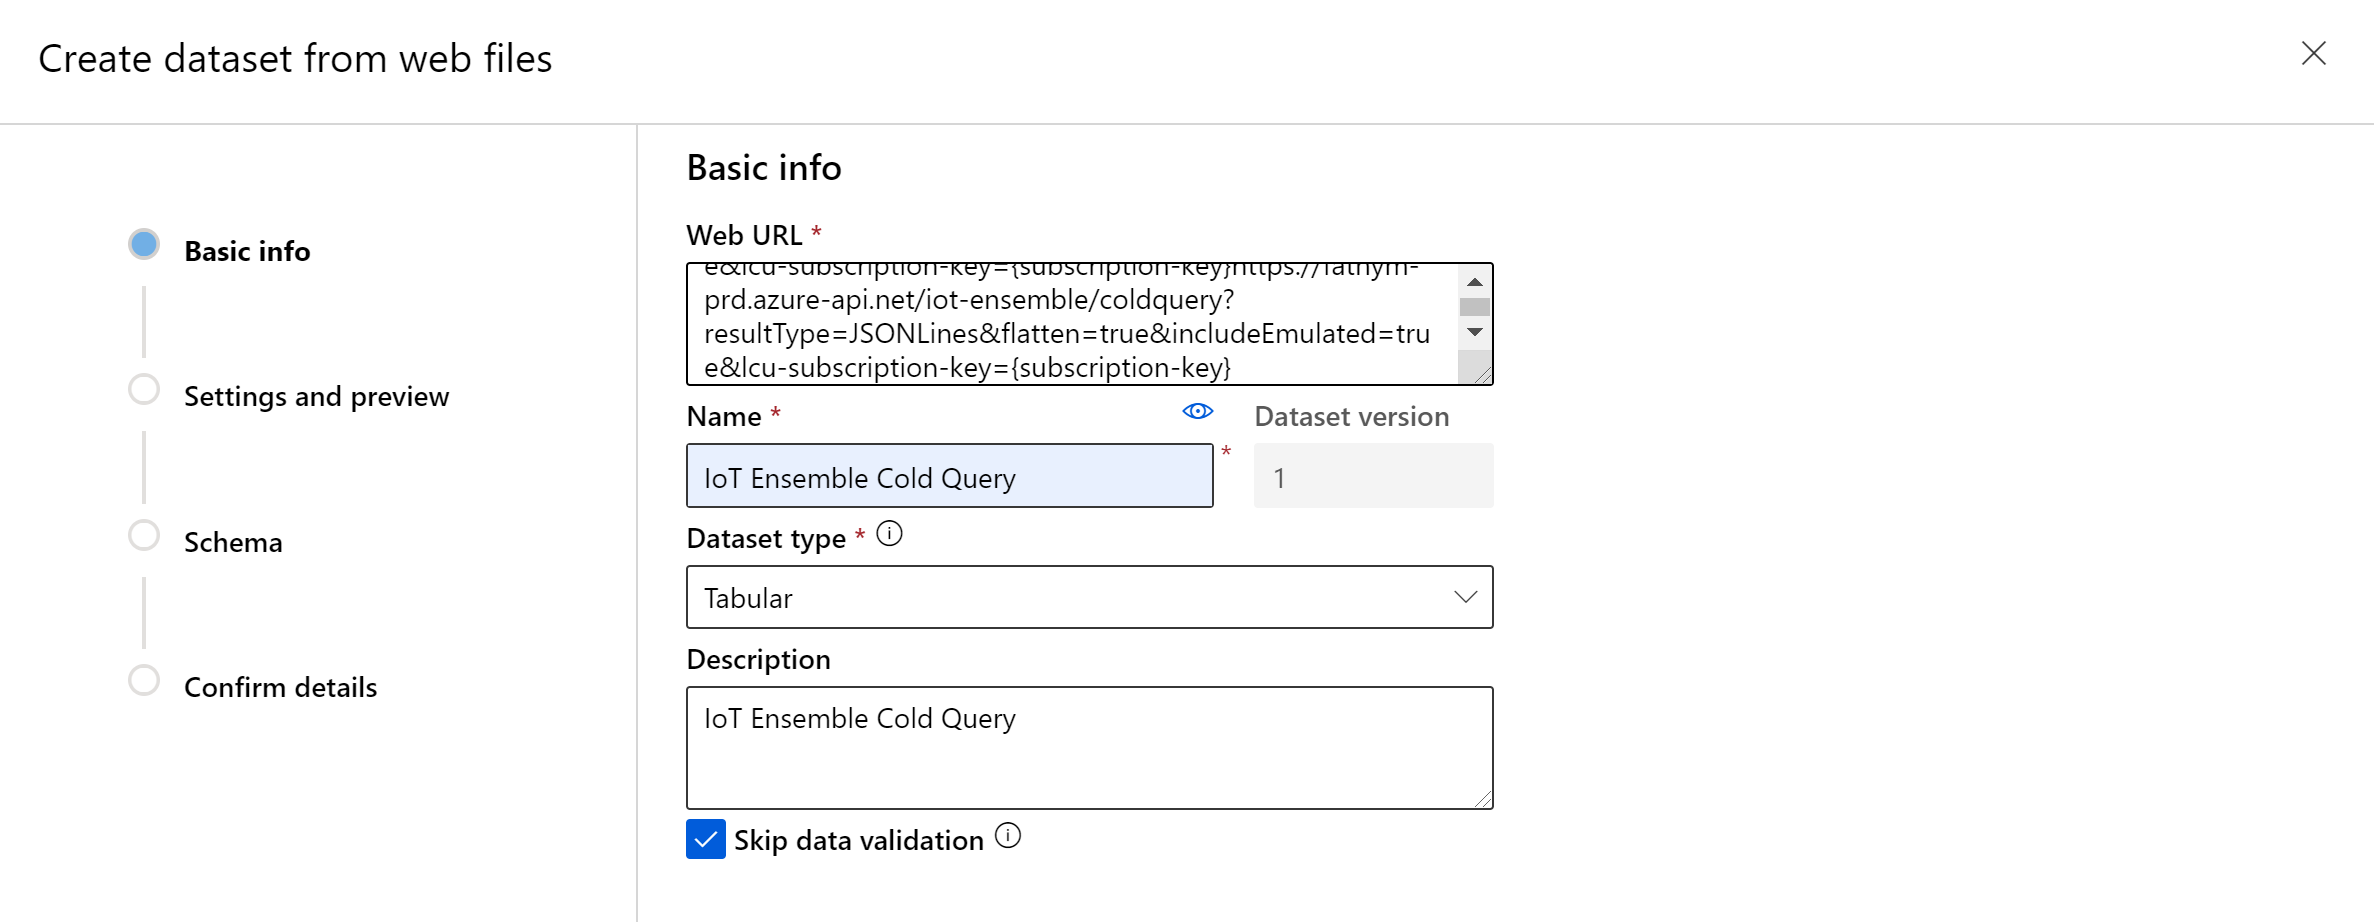
When the dataset create wizard opens, you'll need to input some values. For Web URL, you'll use something like the following cold query call (make sure to replace {subscription-key} with one of the key values from your IoT Ensemble dashboard):
https://fathym-cloud-prd.azure-api.net/fcp-iotensemble/coldquery?resultType=JSONLines&flatten=true&lcu-subscription-key={subscription-key}
This guide is using data returned from our emulated data, and getting started blog. If you would like to use the emulated data, add an additional query string parameter of includeEmulated=true:
https://fathym-cloud-prd.azure-api.net/fcp-iotensemble/coldquery?resultType=JSONLines&flatten=true&includeEmulated=true&lcu-subscription-key={subscription-key}
Now input your own values in the Name and Description text fields, and check the Skip data validation checkbox. With these values entered, select Next.
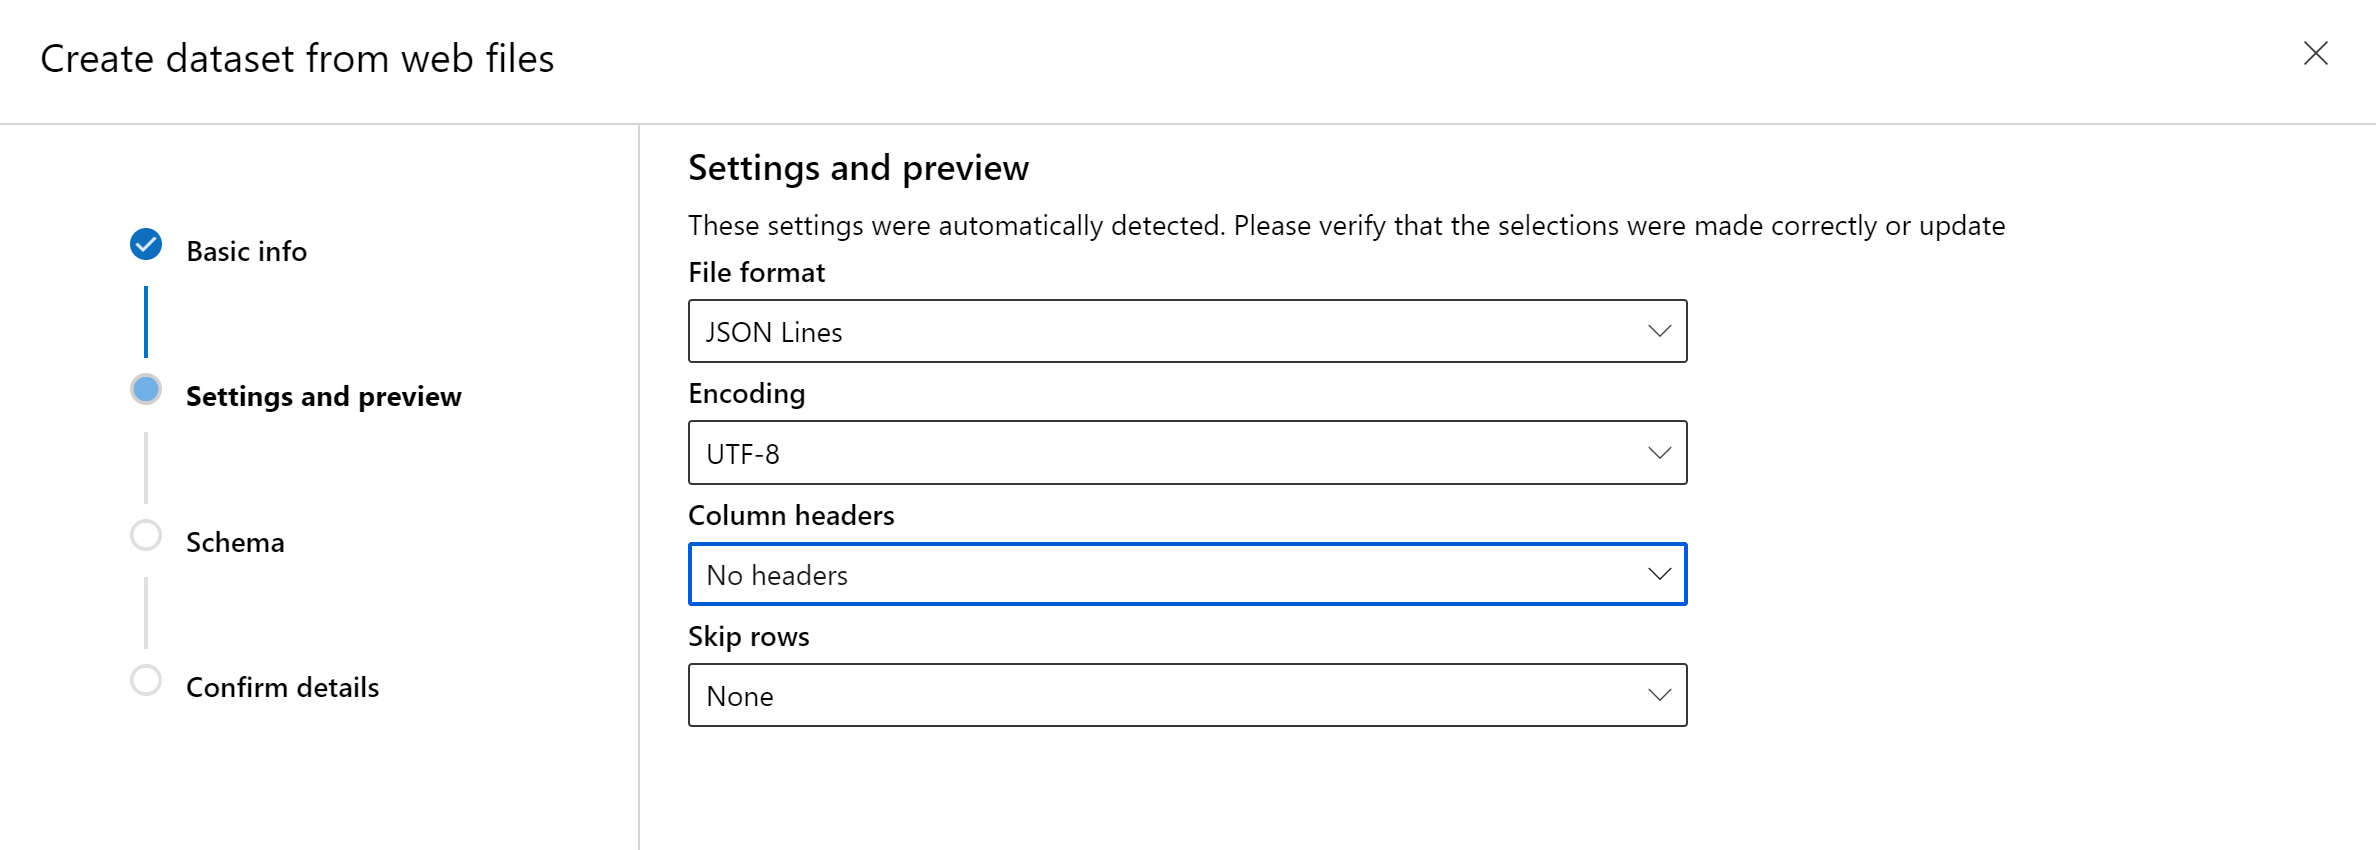
Now we need to set our dataset up with the correct settings to match our cold query endpoint. Set the File format to JSONLines and adjust the Column headers to No headers. Leave the other two values as is and select next:
There is nothing to do on the Schema step, so you can click next through that to confirm your details. If the details look correct, then click Create and wait for the dataset to be ready. Once the dataset is created, you'll be back in the Create Automated ML Run Wizard with the Cold Query dataset in view. Select the newly created data set and click Next to finish configuring the dataset.

Configuring Automated ML Run
The next step is to configure a Azure Automated Machine Learning run so that it can train and build a model of your choosing. Start by setting the New experiment name to TemperatureExperiment, then select the appropriate Target column, for this example the SensorReadings_Temperature column. Now either create or select an existing compute cluster to run the experiment on and select Next.
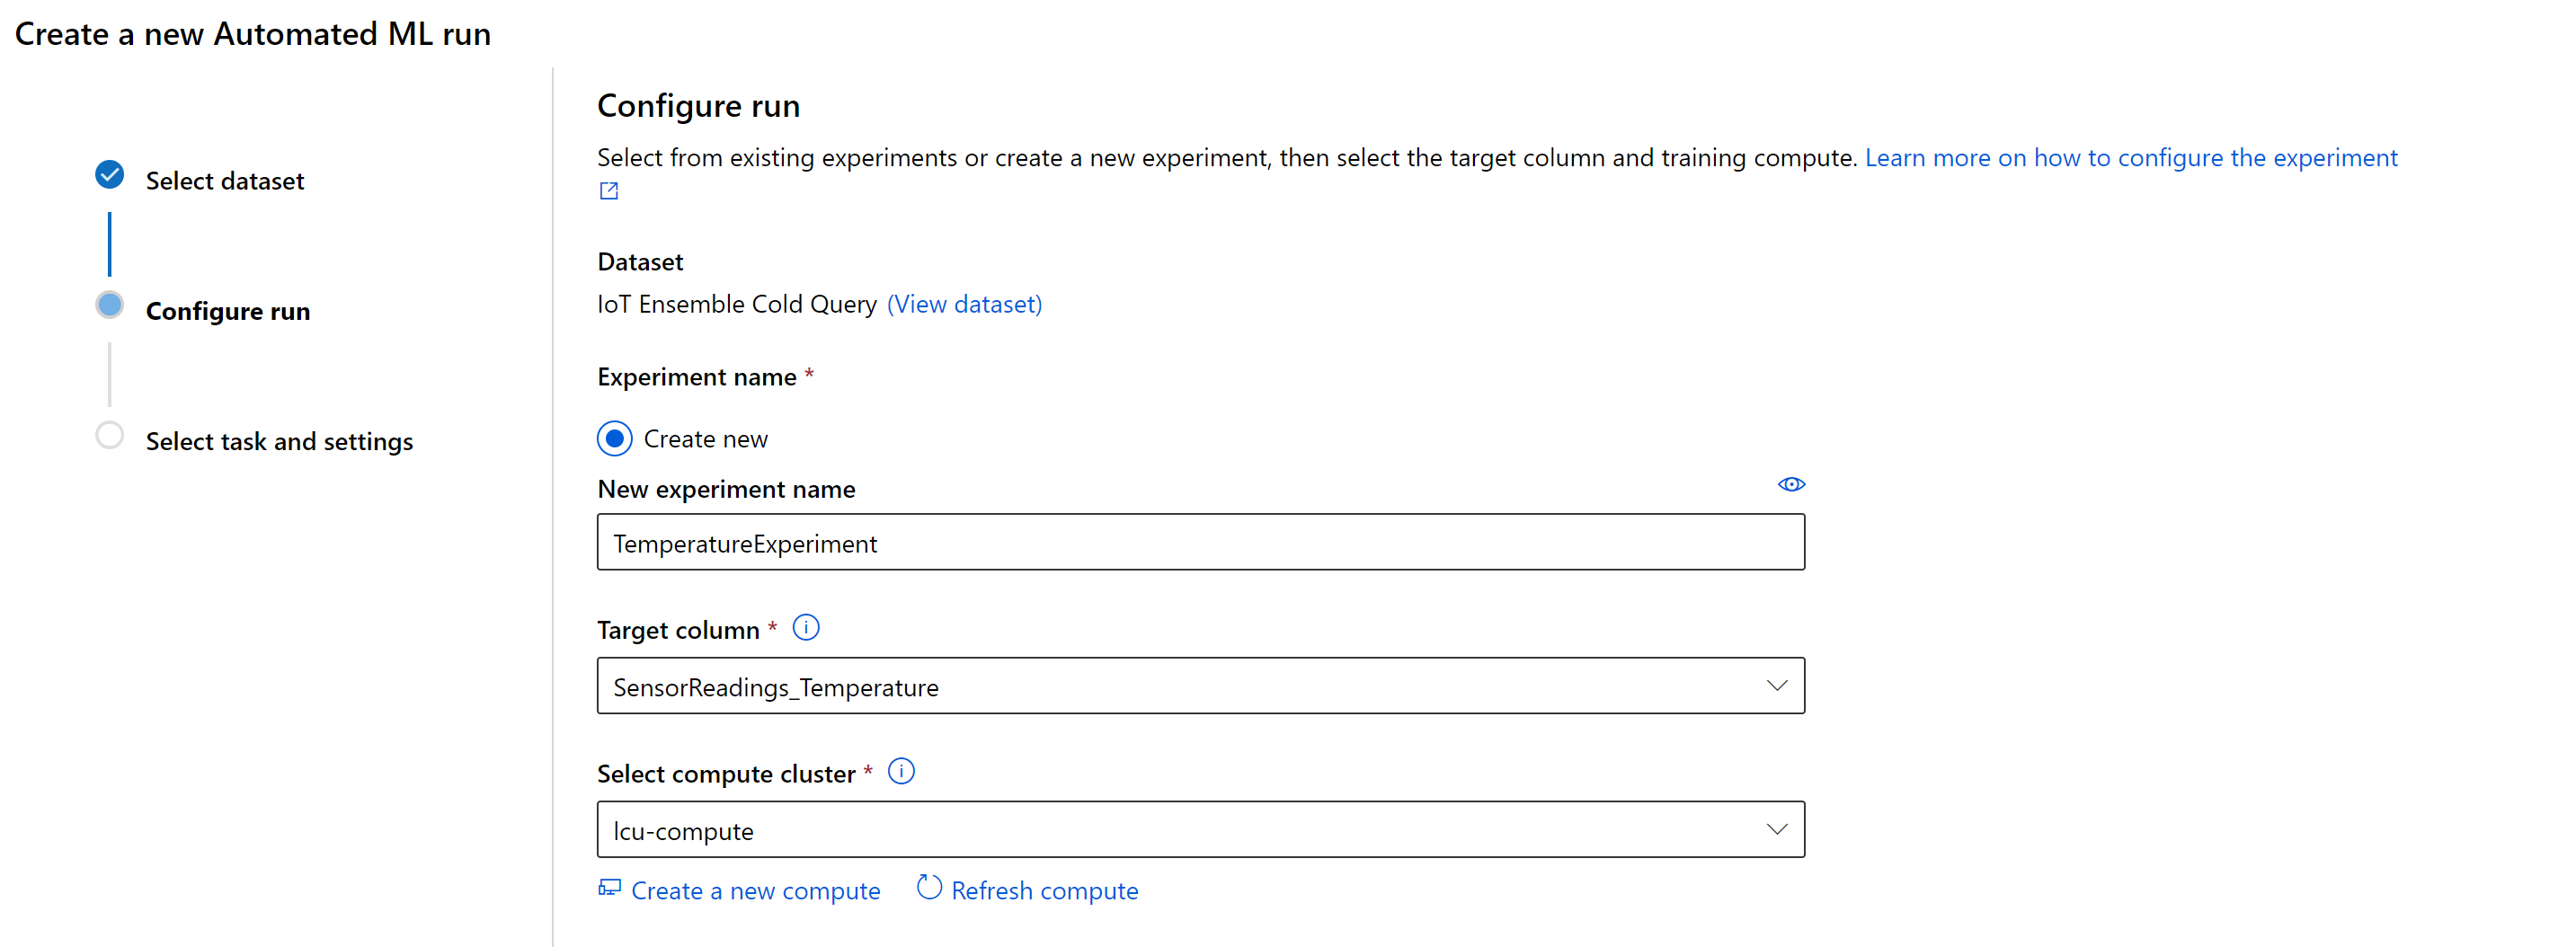
The Cold Query parameter flatten=true is what unfolds complex properties in your IoT Ensemble device payloads, and makes them available in a {PropertyName}_{PropertyName} pattern. So a payload property available at SensorReadings.Temperature becomes available at SensorReadings_Temperature.
Configuring Automated ML Task
Now, based on the data coming from devices, we can choose the Automated ML task that makes sense for our situation. We will be working with our temperature reading and will use the Regression task. Now click on Finish to start the Automated ML run.
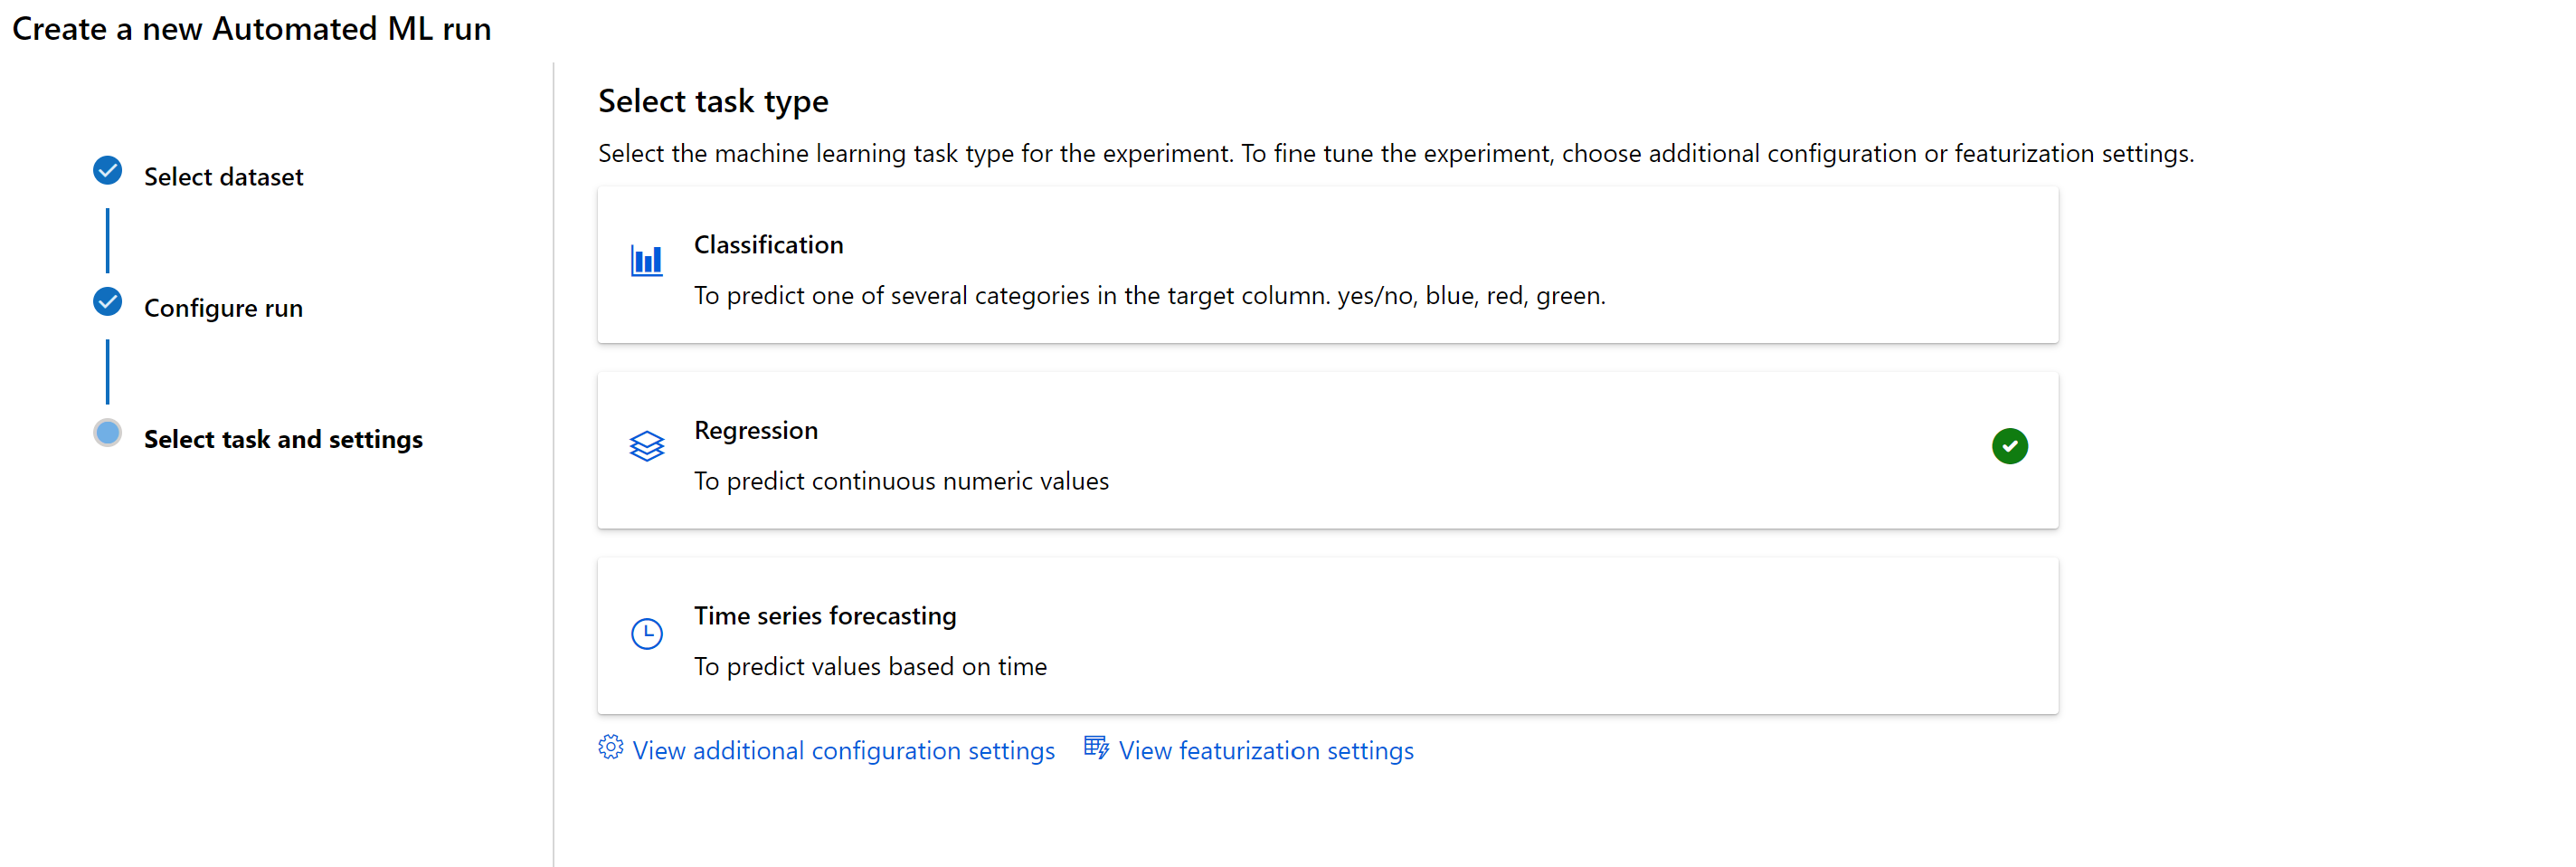
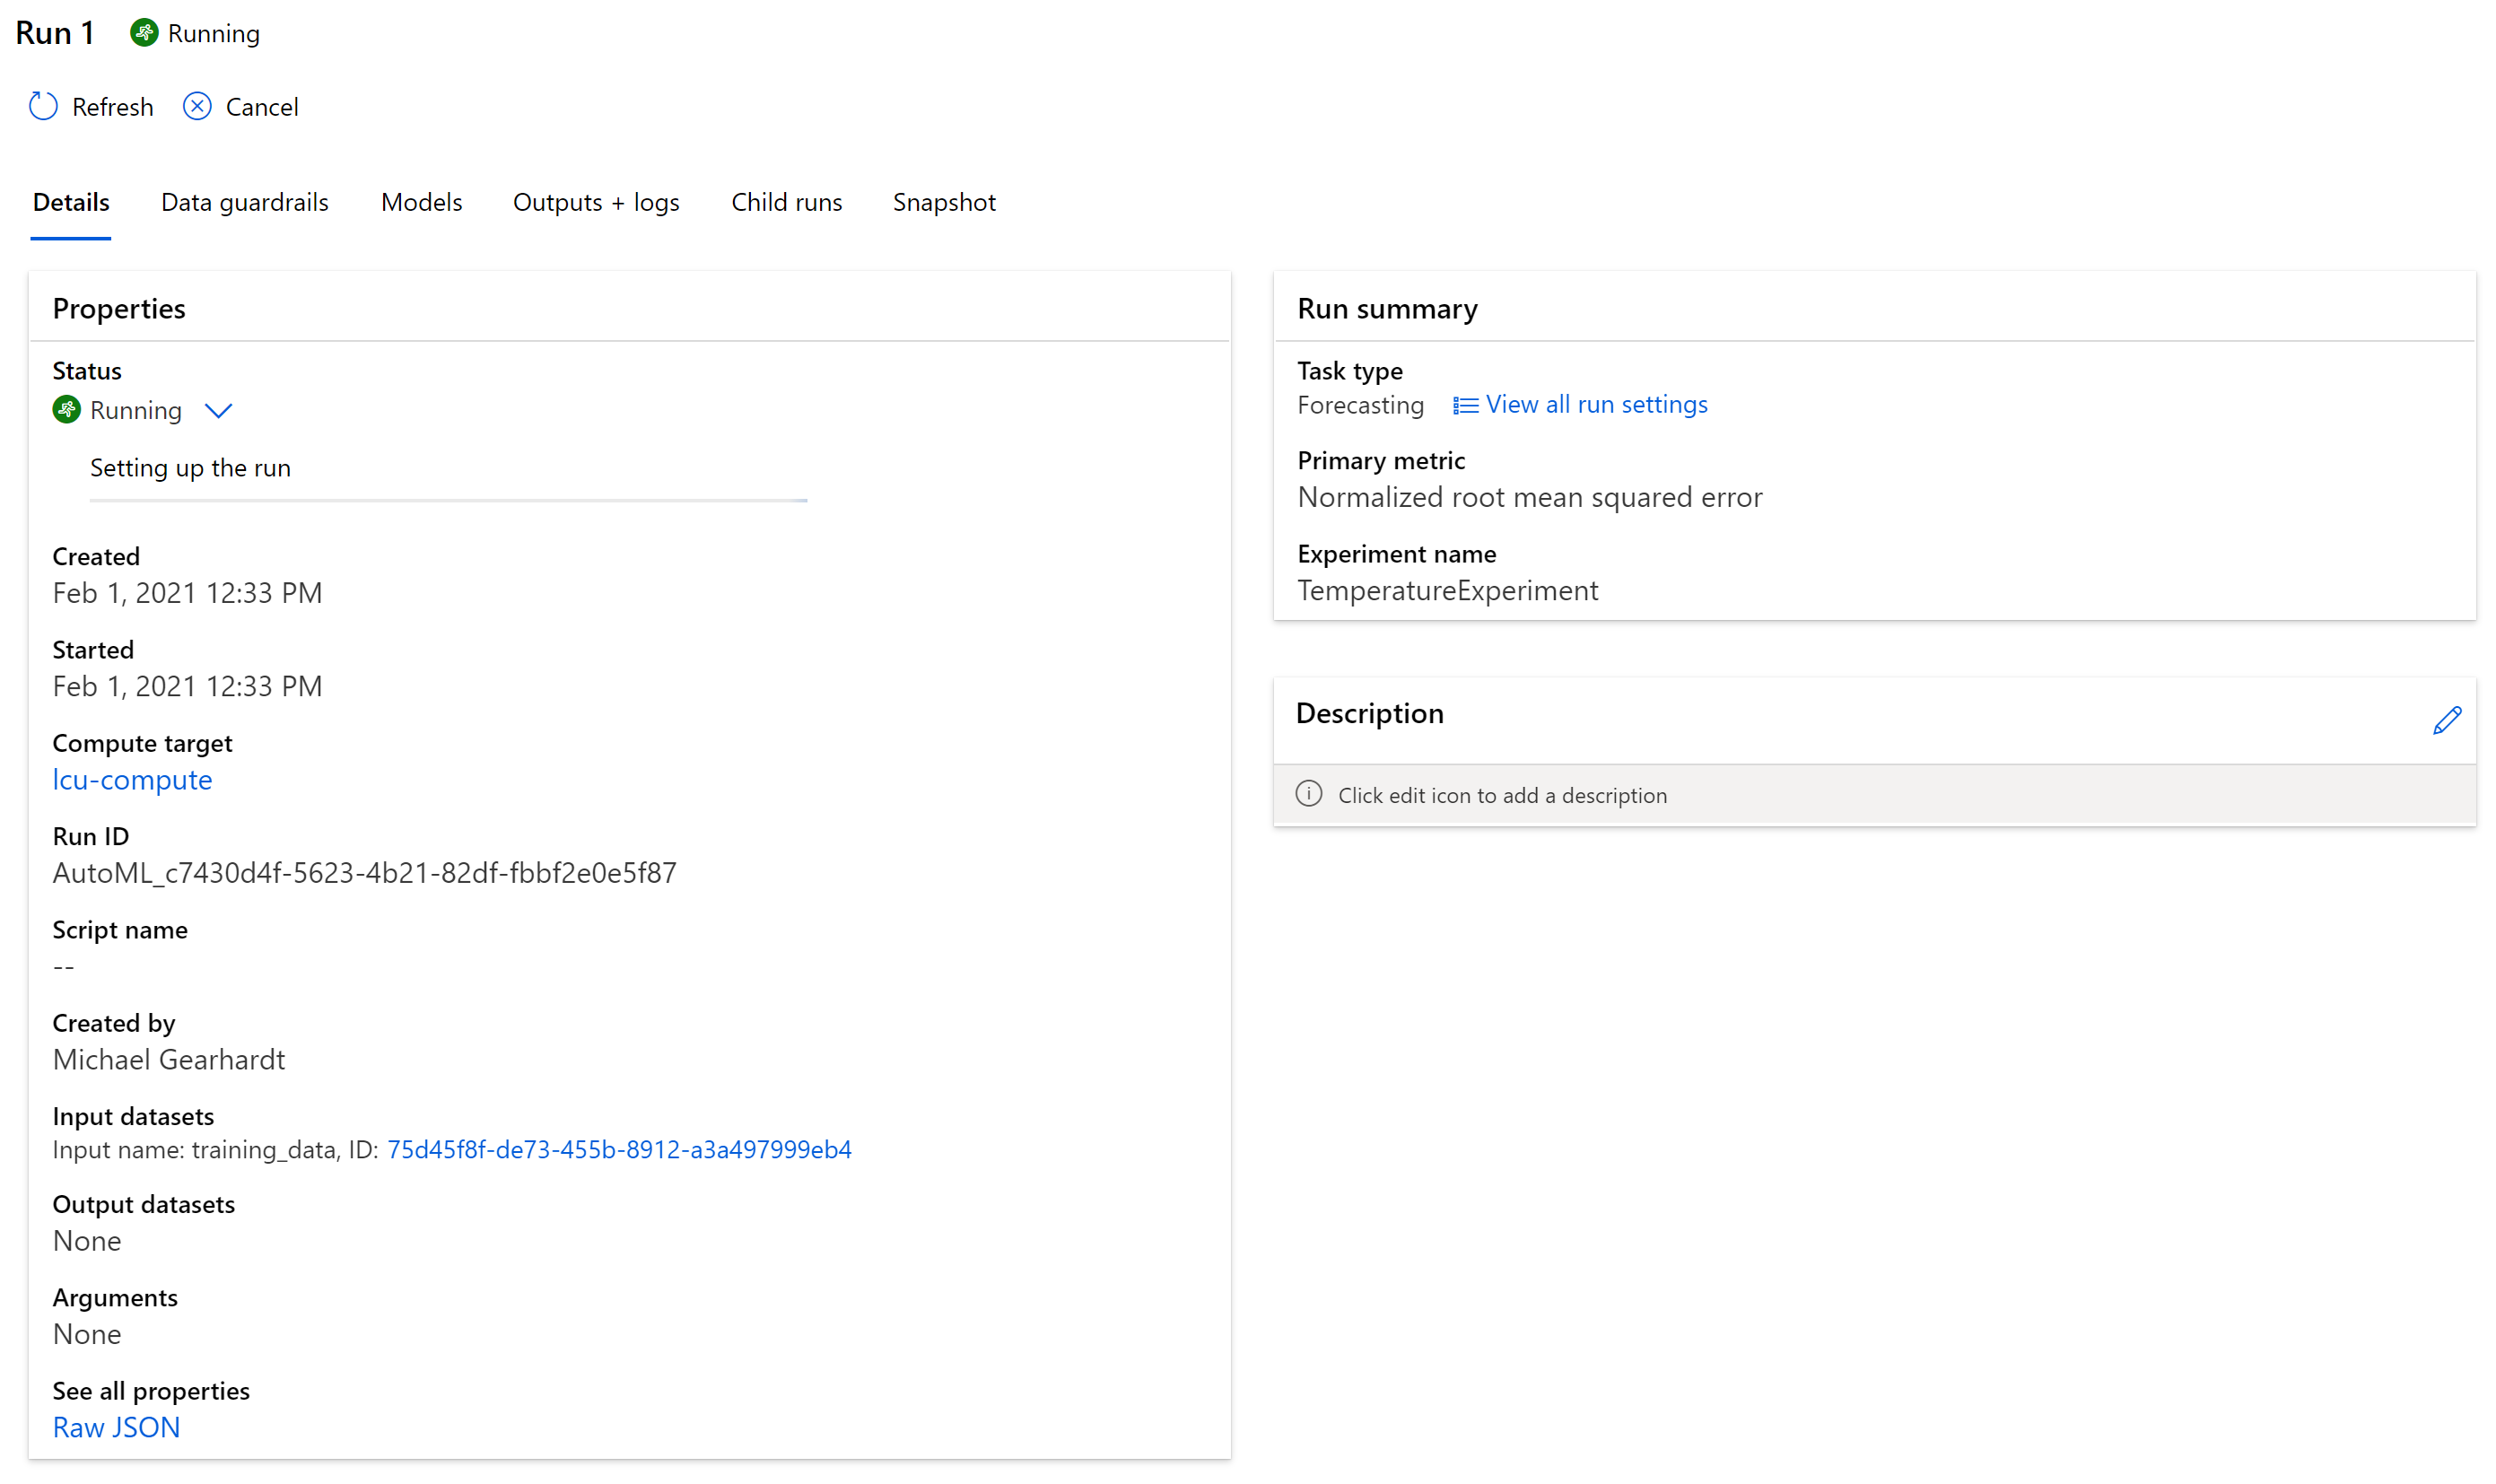
Once the Automated ML is running, you'll have to wait for it to complete to move on to next steps. In the end, this is how simple it is to leverage IoT Ensemble with Azure Machine Learning Automated ML experiments. There is a lot more you can do with Azure Automated ML, read the full docs here. You can see details on the completed model runs from the Models tab and with the click of a button Deploy the best fit model for use.
